
 Pin it
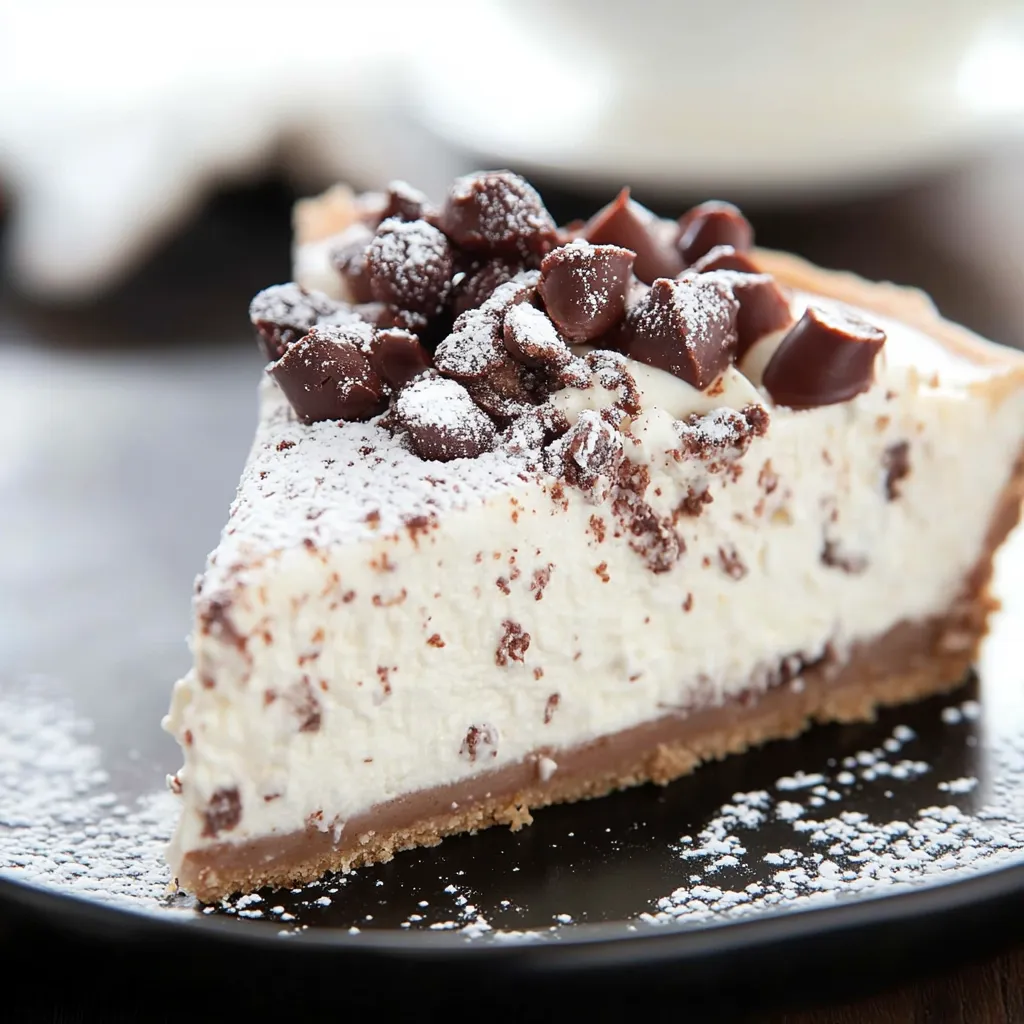
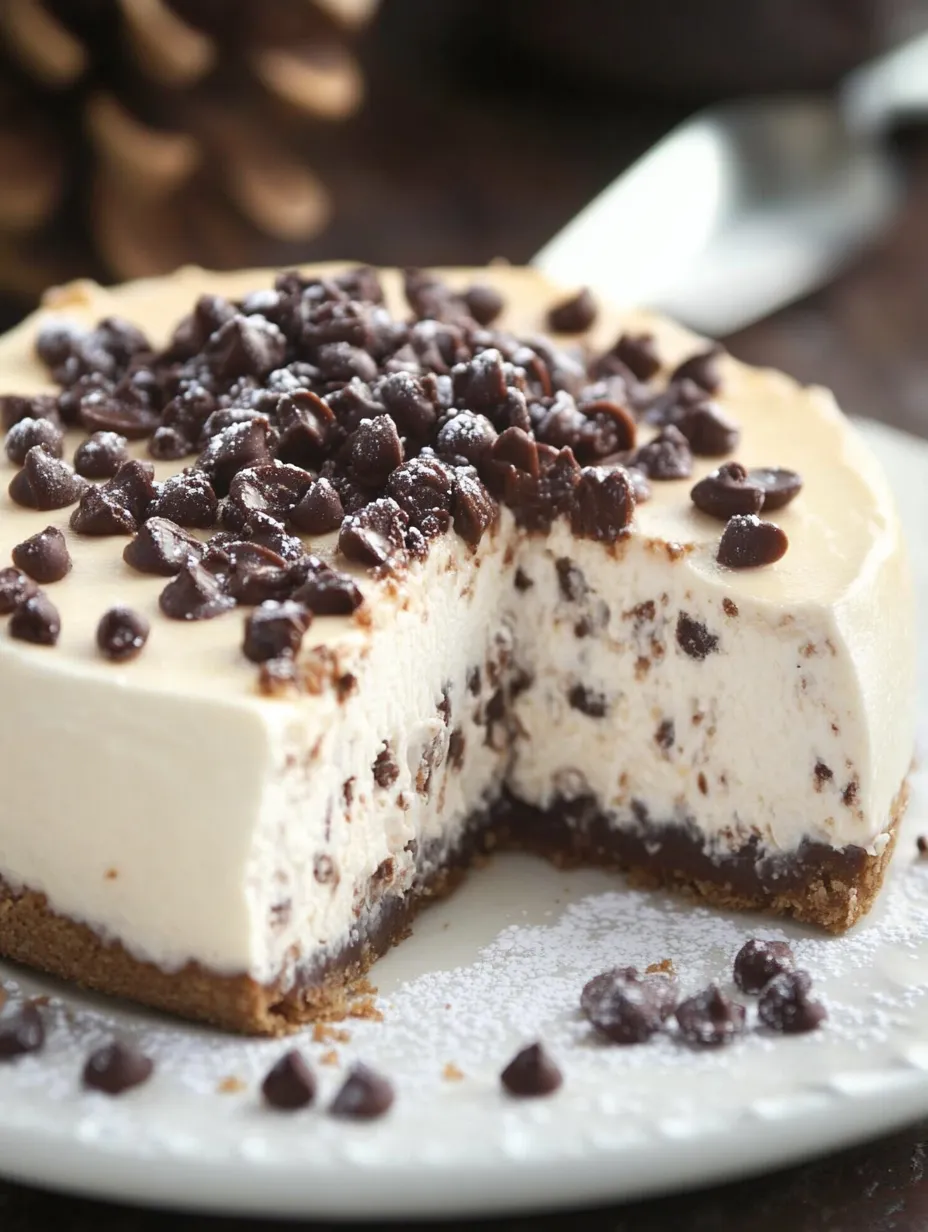
Cannoli cheesecake transforms two beloved desserts into one spectacular creation, combining the crispy-shelled Sicilian pastry with velvety New York-style cheesecake for an unforgettable dessert experience. The marriage of sweet ricotta, mascarpone cheese, and miniature chocolate chips nestled in a cinnamon-kissed crust delivers the essence of cannoli in each forkful while maintaining the luxurious texture of perfect cheesecake.
I discovered this recipe while planning a surprise anniversary dinner for my parents, who honeymooned in Sicily decades ago. When I served this cheesecake, my father became unexpectedly emotional, saying the flavors took him right back to that little pasticceria in Palermo where they'd eaten cannoli every morning. That moment cemented this dessert as our family's celebration cake, making appearances at every milestone since.
Essential Ingredients
- Cannoli shells: Their distinctive flavor provides the signature cannoli essence in the crust. Look for fresh shells at Italian bakeries or specialty grocers for optimal flavor and texture.
- Ricotta cheese: The foundation of authentic cannoli flavor. Always choose whole milk ricotta and drain excess moisture by placing it in a fine-mesh strainer lined with cheesecloth for at least 2 hours before using.
- Mascarpone cheese: Adds luxurious creaminess and balances the tanginess of cream cheese. Source from specialty stores for the freshest product with the mildest flavor.
- Mini chocolate chips: Their small size distributes evenly throughout the filling without sinking. Choose high-quality semi-sweet varieties for the best chocolate flavor.
- Cinnamon: Provides the subtle spice note essential to authentic cannoli. Ceylon cinnamon offers a more delicate flavor than cassia cinnamon.
- Orange zest: Brings brightness and authenticity to the filling. Use organic oranges and zest only the outer orange layer, avoiding the bitter white pith.
- Pistachios: Their vibrant green color and nutty flavor are traditional cannoli garnishes. Purchase unsalted pistachios and toast lightly to enhance flavor.
After years of experimentation, I've found that combining ricotta and mascarpone with standard cream cheese creates the perfect balance of authentic cannoli flavor while maintaining the structural integrity expected from cheesecake. Pure cannoli filling would be too soft to hold a slice shape, while standard cheesecake lacks the distinctive cannoli character.
Baking Magic
- Crust Creation:
- Begin by processing graham crackers and cannoli shells into fine crumbs using a food processor. The shells should be completely broken down without any large pieces remaining. Combine with melted butter, sugar, and cinnamon, stirring until the mixture resembles wet sand. Press firmly into the bottom and slightly up the sides of a springform pan, using the flat bottom of a measuring cup to compact the crust evenly. Bake at 350°F for exactly 10 minutes until lightly golden and fragrant, then cool completely before filling.
- Filling Perfection:
- Ensure all dairy ingredients are at room temperature before beginning. Beat cream cheese and mascarpone together until completely smooth with no lumps. Add sugar gradually while mixing at medium-low speed to incorporate without adding excess air. Once smooth, blend in the drained ricotta until just combined. Add eggs one at a time, mixing on low speed after each addition just until incorporated, never over-mixing. Fold in vanilla, orange zest, and mini chocolate chips by hand using a rubber spatula with gentle, sweeping motions to maintain the filling's creamy texture.
- Water Bath Wisdom:
- Prepare a water bath by wrapping the outside of your springform pan with a double layer of heavy-duty aluminum foil, ensuring there are no seams or tears where water could seep in. Pour the filling into the cooled crust and smooth the top with an offset spatula. Place the wrapped cheesecake in a larger roasting pan and carefully pour hot water into the roasting pan until it reaches halfway up the sides of the springform pan. This critical step ensures gentle, even baking that prevents cracks and creates the silkiest texture.
- Cooling Strategy:
- Bake at 325°F for 70-75 minutes until the edges are set but the center still has a slight jiggle when gently shaken. Without opening the oven door, turn off the heat and let the cheesecake rest inside the cooling oven for one hour. This gradual cooling prevents the dramatic temperature change that often causes cheesecakes to crack. After an hour, crack the oven door open and allow another hour of cooling before removing to room temperature and finally refrigerating overnight.
 Pin it
My Italian grandmother always insisted on adding a splash of Marsala wine to her cannoli filling, claiming it was the secret ingredient that elevated the flavor to true Sicilian authenticity. After trying it both ways, I now include two tablespoons in my cheesecake filling, finding that it adds a subtle complexity that disappears during baking but leaves behind an intriguing depth of flavor.
I've discovered through trial and error that lining the bottom of the springform pan with parchment paper prevents any possibility of the crust sticking when serving. This simple step ensures perfect slices every time without damaging that beautiful crust you've worked so hard to create.
For serving at special occasions, I've found that preparing individual garnishes of whipped cream, chocolate chips, and crushed pistachios in separate bowls allows guests to customize their slices. This interactive element always delights guests and creates conversation around the table.
Serving Suggestions
Present this spectacular dessert on a beautiful cake stand with a pitcher of espresso or Italian coffee nearby. For the ultimate experience, serve slices slightly chilled but not cold – about 20 minutes out of the refrigerator allows the flavors to fully blossom. A light dusting of powdered sugar just before serving adds an elegant touch reminiscent of fresh snow on the Sicilian mountains.
Creative Variations
Transform this classic with thoughtful variations that maintain its essence while creating new experiences. Create a chocolate lover's version by adding two tablespoons of cocoa powder to the crust and using mini dark chocolate chips in the filling. For summer entertaining, add a fresh berry compote topping with strawberries and blueberries. Create a pistachio version by incorporating ground pistachios into the crust and topping with a pistachio cream drizzle.
Storage Secrets
This cheesecake maintains perfect quality when stored in the refrigerator for up to four days, making it ideal for prepare-ahead entertaining. Cover loosely with foil rather than plastic wrap to prevent condensation from forming on the surface. For longer storage, freeze individual slices wrapped tightly in plastic wrap then aluminum foil for up to two months. Thaw overnight in the refrigerator for the best texture restoration.
 Pin it
My journey with this cannoli cheesecake began as an attempt to honor family heritage but evolved into creating new memories around our table. What makes this dessert truly special isn't just its incredible flavor and texture – it's how it brings people together in appreciation of tradition while creating something new. Whether you're celebrating a special occasion or simply treating yourself to something extraordinary, this cannoli cheesecake bridges generations and creates moments of pure joy with every heavenly bite.
Frequently Asked Questions
- → Can I make this without a springform pan?
- Not recommended - the springform is essential for removing this delicate cheesecake intact.
- → How do I prevent cracks?
- The water bath and gradual cooling process are key. Also avoid overmixing after adding eggs.
- → Can I use all ricotta instead of mascarpone?
- You can, but the texture will be grainier. For best results, use the mascarpone combination.
- → How far in advance can I make this?
- Make 1-2 days ahead - the flavors improve overnight. Add topping within 4 hours of serving.
- → Can I freeze this cheesecake?
- Yes, freeze without topping for up to 1 month. Thaw overnight in fridge before topping.