
 Pin it
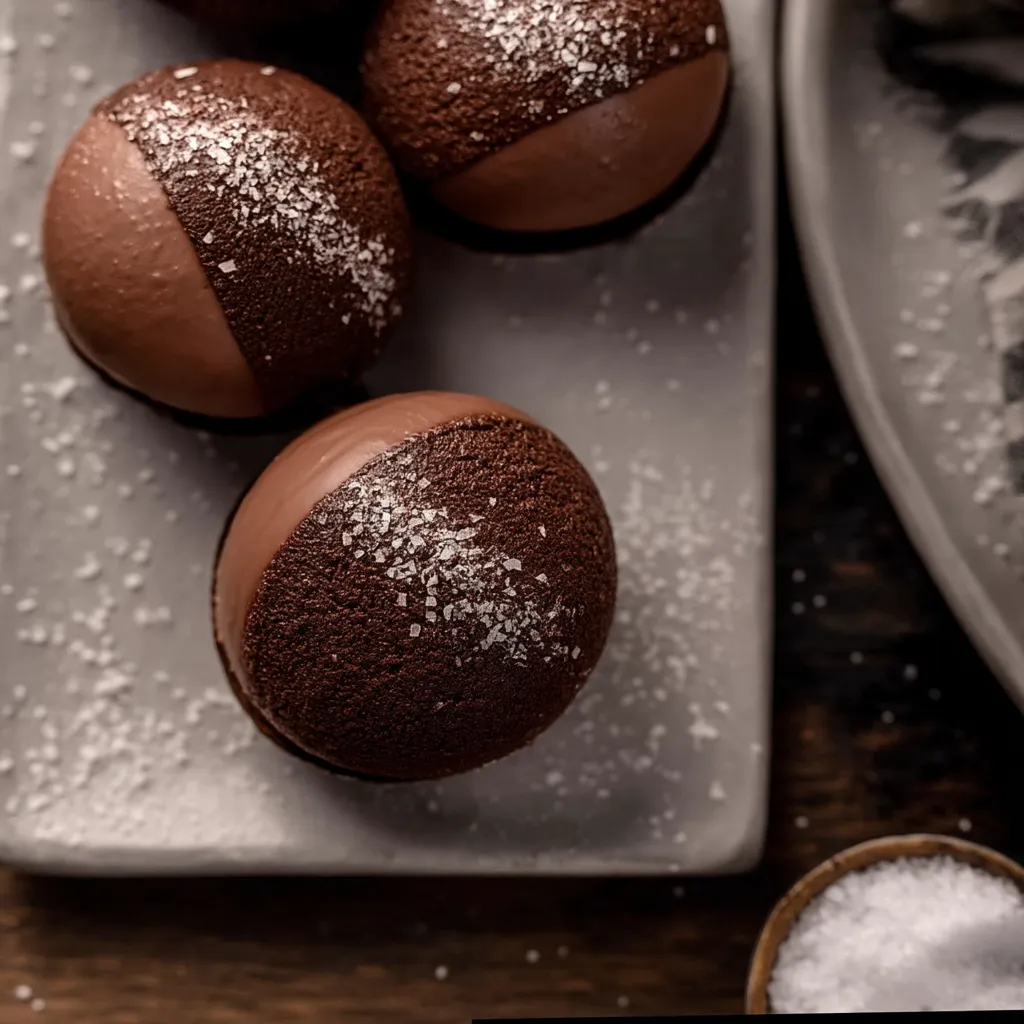
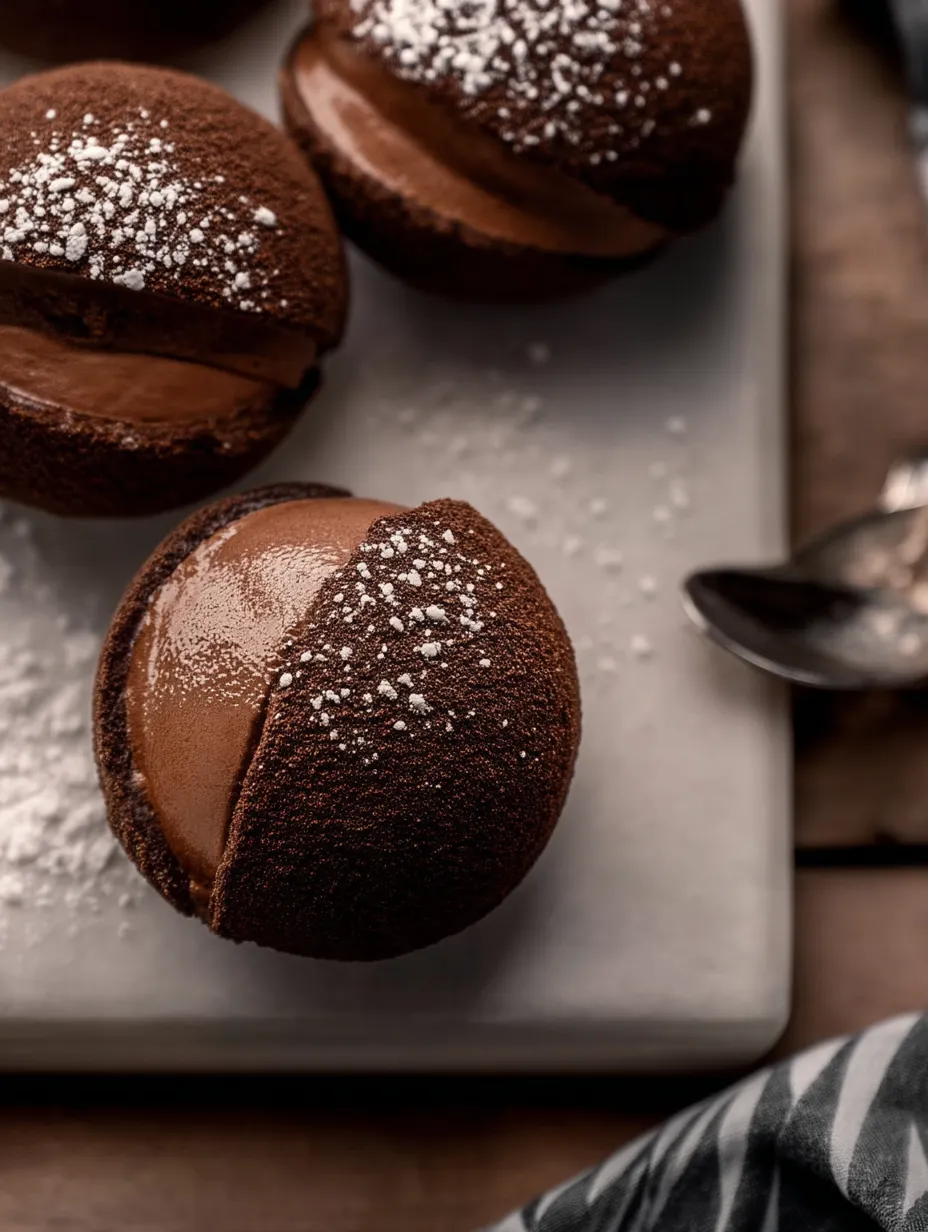
These cocoa-filled takes on traditional Maritozzi combine indulgent chocolate brioche buns stuffed with velvety chocolate whipped cream. The way these light, fluffy rolls pair with their creamy centers makes these Italian delights impossible to resist whether you're starting your day or ending your meal.
Ingredients
- Bread flour: Creates that lovely structure and bite while keeping the buns soft and tender.
- All purpose flour: Works with the bread flour to give you that perfect consistency that won't feel heavy.
- Dutch process cocoa powder: Delivers rich chocolate flavor and beautiful color. Try to get good quality stuff for the tastiest results.
- Instant yeast: Gets your dough rising reliably without extra steps. Just check it's not expired for best results.
- Whole milk: Brings a nice richness to your dough that makes everything more tender than water would.
- Heavy whipping cream: Needs to be super cold to whip up properly for filling. I suggest putting your mixing bowl and beaters in the fridge beforehand too.
Step-by-Step Instructions
- Mixing the dough:
- Put all your stuff in the stand mixer bowl with the dough hook. Begin on low to get everything mixed, then turn it up to medium. You'll need about 8 minutes for the gluten to form properly. The dough's ready when it comes away from the sides but still clings a bit to the bottom. It should feel smooth but slightly sticky when you touch it.
- First rise:
- Move the dough to a bowl with a touch of oil, flip once to get oil all over. Cover with plastic or a damp towel. Let it grow in a warm spot until it's twice as big, around 1-2 hours based on how warm your kitchen is. You'll know it's done when it's obviously bigger and feels puffy if you poke it gently.
- Shaping the buns:
- Cut the dough into equal chunks with a bench scraper. To shape each one, press it flat, then fold the edges to the middle and pinch them closed. Put it seam-side down and cup your hand around it. Move in circles with gentle pressure to create tension on the surface, making a nice round ball with a smooth top.
- Second rise:
- Put your shaped balls on a parchment-lined tray with space between them. Cover loosely with plastic or a towel. Let them puff up for 30-60 minutes. They should get almost twice as big, and when you press one with your finger, the dent should slowly fill back in.
- Baking to perfection:
- Brush the puffy buns with egg wash for a nice sheen. Bake in your hot oven until they're done, around 16 minutes. Since they're chocolate buns, you can't really see color change. Tap the bottom - they'll sound hollow when done. Let them cool completely on a rack before you add filling.
- Creating the filling:
- Mix cold heavy cream, cocoa powder, powdered sugar, and salt in a cold bowl. Whip it until it forms medium stiff peaks. The cream should hold its shape but still be a little soft. Keep it in the fridge until you need it so it stays firm.
- Filling the buns:
- Cut each bun horizontally about three-quarters through, making a pocket while keeping it connected. Put or spoon lots of chocolate whipped cream into each one. Flatten the top of the cream with an offset spatula so it looks neat. Add a light dusting of powdered sugar right before you serve them.
 Pin it
You Must Know
- Eat these buns within a day of making them to get the best texture and freshness.
- You can make the dough ahead and let it do its first rise in the fridge overnight for extra flavor.
- I truly think the magic of these Maritozzi comes down to using good cocoa powder. I figured this out after trying different brands and seeing how a high-quality Dutch process cocoa really brings out that deep, interesting chocolate taste that turns these from ordinary buns into something amazing. My grandma always told me quality ingredients speak for themselves, and that's so true with these chocolate buns.
Storage and Make Ahead Tips
Empty buns will stay good in a sealed container at room temperature for up to 2 days. After filling, keep them in the fridge and eat them within 24 hours before the bread starts getting dry from the cold.
If you want to prep ahead, you can freeze the baked unfilled buns for up to a month. Let them thaw at room temperature and warm them in a 300°F oven for 5 minutes before adding filling. You can make the whipped cream up to 4 hours ahead and keep it in the fridge.
 Pin it
Flavor Variations
The chocolate base in these Maritozzi makes them super flexible for different fillings and mix-ins. Try adding crushed chocolate cookies to the whipped cream for some crunch. For deeper flavor, mix a tablespoon of instant espresso powder into the dough to bring out the chocolate notes.
You could also add orange zest to the dough and a bit of orange liqueur in the whipped cream for that classic chocolate-orange combo. Or swap out the chocolate whipped cream completely and use hazelnut cream, pastry cream, or even mascarpone for different tasty versions.
Cultural Context
Maritozzi came from Rome as sweet rolls typically eaten during Lent. The traditional version is plain brioche filled with whipped cream, often eaten for breakfast with espresso. This chocolate version puts a modern spin on the classic while keeping true to its roots.
The name Maritozzi comes from the Italian word marito meaning husband, since these buns were traditionally gifts from men to their future wives. Now they're a beloved part of Roman food culture that's spread all over Italy and beyond.
Frequently Asked Questions
- → What makes the buns extra fluffy?
Keep kneading until the dough turns elastic and smooth. Make sure your dough rises until it’s doubled in size before the next steps.
- → Can I use alternate flours?
A mix of all-purpose and bread flour works best for texture. Swapping out flours can slightly change the softness.
- → Any tips for the cream filling?
Aside from cream, feel free to add jam, fruits, or chocolate chips to create new flavors.
- → How should I store them?
Keep unfilled buns in an airtight container at room temp. Put filled ones in the fridge so the cream stays fresh longer.
- → How can I split dough evenly?
Weigh pieces with a kitchen scale or eyeball even portions after dividing the dough into similar-sized sections.