
 Pin it
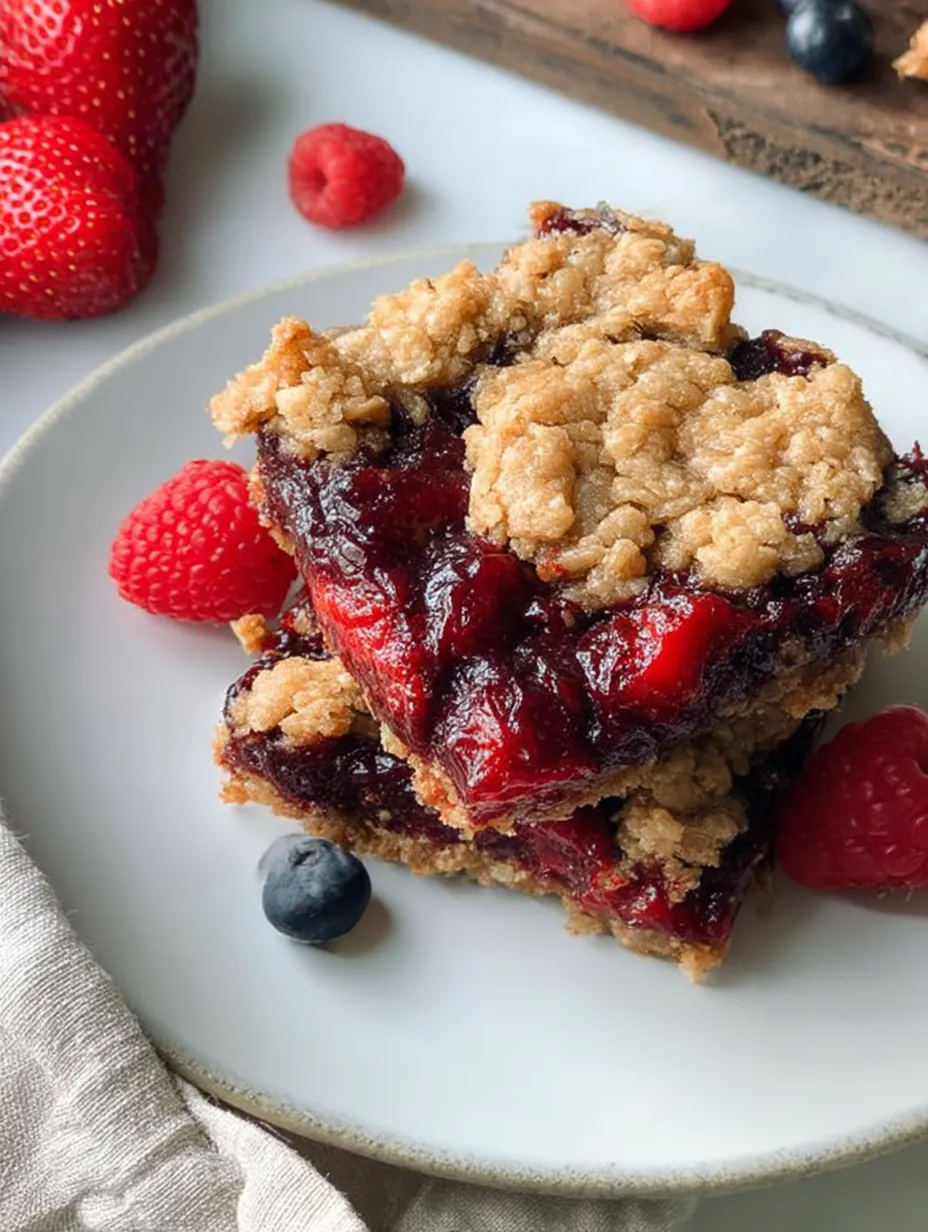
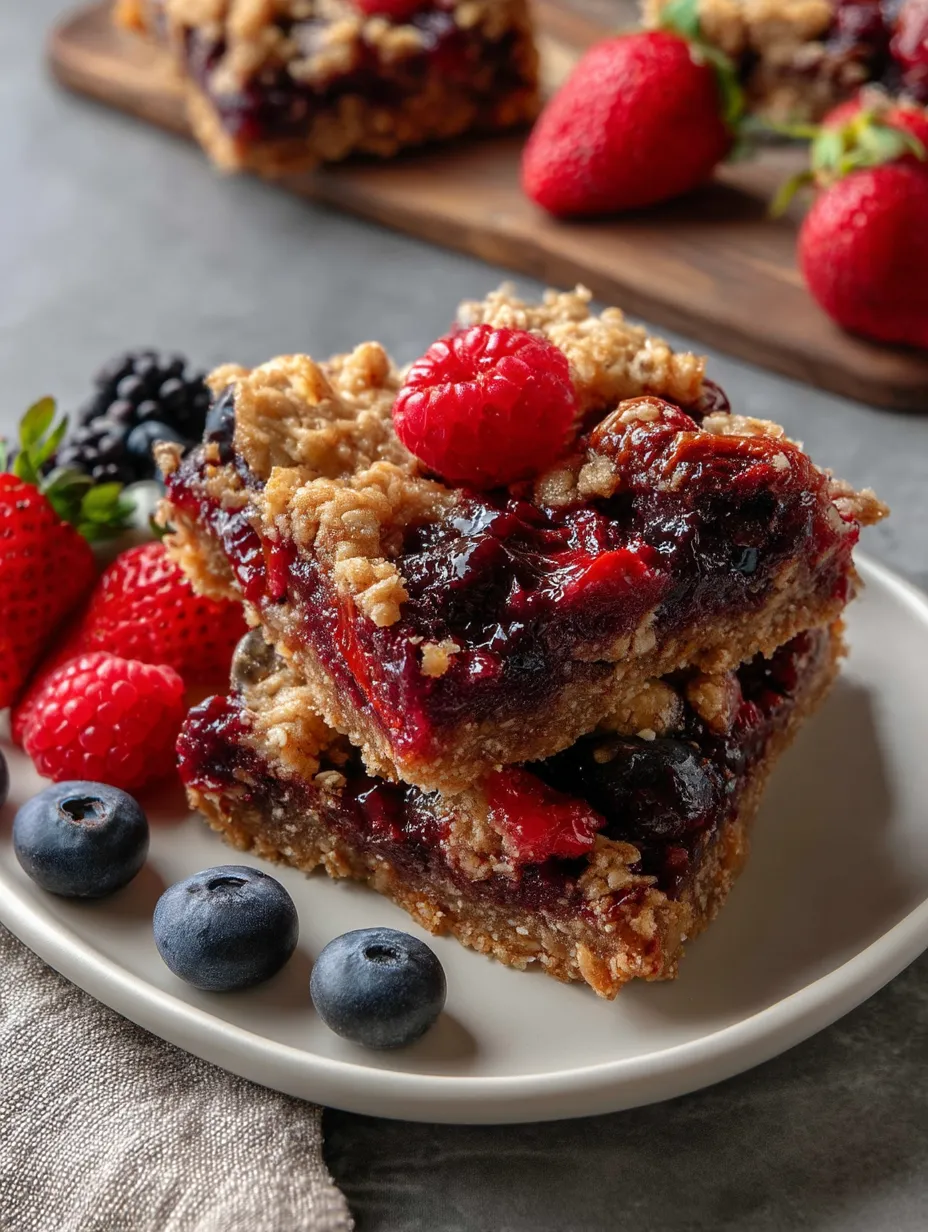
I've fallen head over heels for these chunky Berry Oatmeal Bars that now show up at my table every weekend. They work double duty as my morning meal and afternoon treat. With frozen berries tucked into a crunchy oat base, they hit that sweet spot between yummy and good-for-you with each bite.
I whipped these up during lockdown when the fresh fruit shelves sat empty, and now they're what everyone asks for when they stop by for morning eats. Something about those tangy berries with the sweet, crumbly oats just hits right every time.
Ingredients
Mixed Berry Filling
- Frozen berries: 2 cups, handy all year and packed with more goodness than off-season fresh ones
- Lemon juice: 1 Tablespoon, kicks up the berry taste and cuts through sweetness
- Coconut sugar: 2 Tablespoons, brings a warm, brown-sugar vibe that works magic with the fruit
- Maple syrup: 2 Tablespoons, adds natural sweetness and helps create that sticky, jammy goodness
- Sea salt: A pinch, brings out all the tastes and balances the sweet stuff
- Tapioca starch: 1 ½ Tablespoons, makes everything thick without tasting powdery (you'll find it with baking stuff)
Oatmeal Crust and Crumble Topping
- Rolled oats: 1 ¾ cups, go for the chunky kind for better bite and grab the gluten-free ones if your tummy needs it
- Blanched almond flour: 1 ¼ cups, makes everything soft while sneaking in protein and good fats
- Baking soda: ½ teaspoon, gives just enough puff for that perfect crumbly feel
- Sea salt: ⅛ teaspoon, keeps the crust from tasting too sweet
- Maple syrup: ½ cup, sticks everything together and adds deep flavor notes
- Coconut oil: ⅓ cup, hard when cool and makes the crust break apart just right
- Pure vanilla extract: ½ teaspoon, rounds out all the flavors beautifully
Step-by-Step Instructions
- Preparation:
- Get your oven going at 375 degrees Fahrenheit and put parchment in a 9x9 baking dish. Let the paper hang over so you can pull everything out easily later.
- Berry Prep:
- Check your frozen berries for any big strawberries. Either skip them or cut them smaller so everything cooks the same. Berries that are all about the same size will make your filling turn out better.
- Cook the Filling:
- Put a small pot on medium-low heat. Dump in your berries, lemon juice, coconut sugar, maple syrup and salt. Let it all warm up for 5-10 minutes until the berries get juicy and runny. You'll know it's ready when the colors pop and it smells amazing.
- Thicken the Filling:
- Scoop out a spoonful or two of berry juice into a cup. Mix in the tapioca starch and stir like crazy until it's smooth with no lumps. Pour it back into the pot with the berries. Keep stirring for about a minute until it gets thicker. Take it off the heat and set it aside.
- Make the Oatmeal Mixture:
- In a big bowl, throw together the oats, almond flour, baking soda and salt. Mix it up real good to spread out the baking soda. Add the maple syrup, vanilla and solid coconut oil to your dry stuff.
- Create the Crumble:
- Mix it all with a fork, working to break up the coconut oil until it looks like rough crumbs. You want it clumpy but mixed up. Finish mixing with your hands to get everything blended just right.
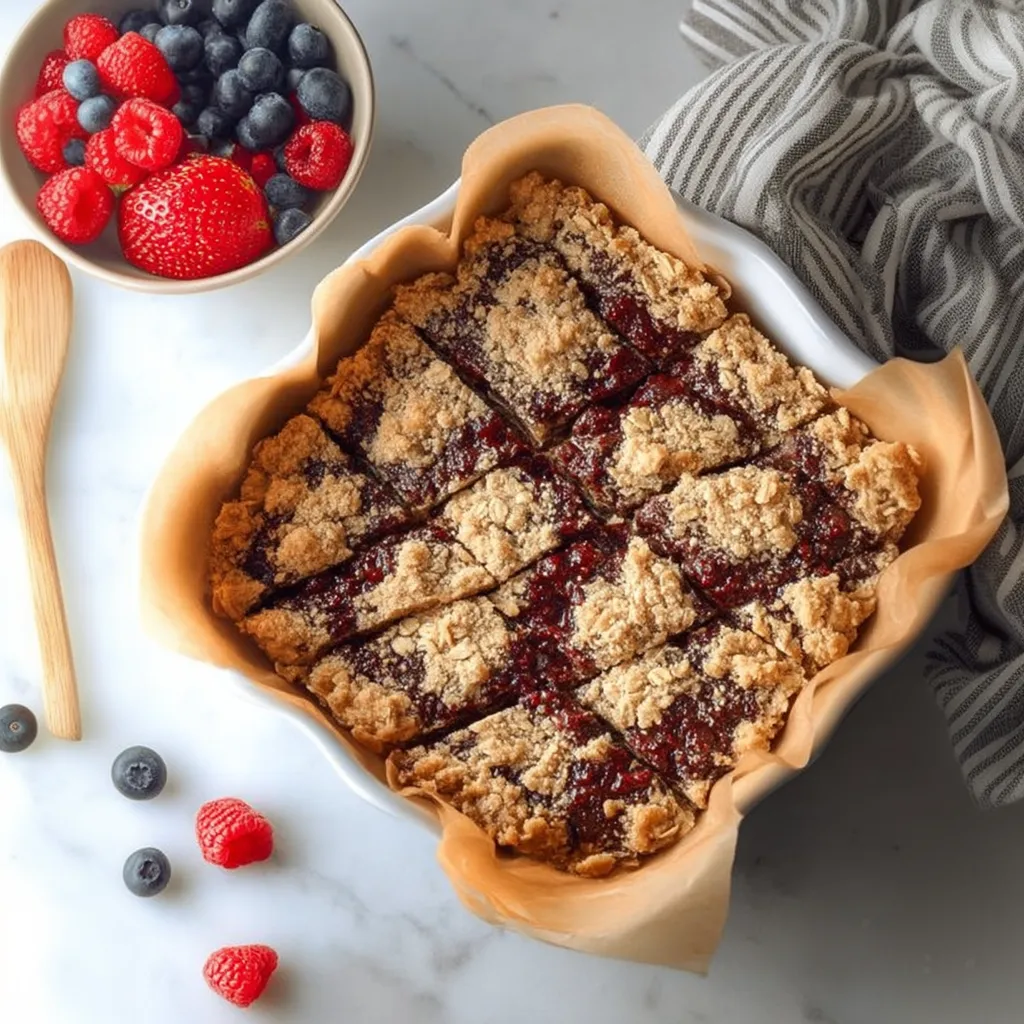
- Form the Base Layer:
- Save about ½-¾ cup of the oat mix for the top. Push the rest firmly into the bottom of your dish, making a flat layer that reaches all the corners.
- Add the Filling:
- Pour your thick berry mix over the oat base. Spread it all the way to the edges so every bite has berry goodness.
- Add the Crumble Topping:
- Sprinkle the oat mix you saved over the berries. You can squeeze it in your hand first for big chunks, or keep it loose for smaller bits.
- Bake:
- Stick the dish in your hot oven and bake for 20-25 minutes. Look for light golden edges to know it's done. The filling should bubble a little around the sides.
- Cool Completely:
- Let it cool all the way in the pan before you try to cut it. This step really matters if you want them to hold together. For best results, stick it in the fridge for at least an hour before cutting.
 Pin it
Almond flour is the real MVP in this mix. I stumbled on its magic while playing around with grain-free stuff, and its light nutty taste sets up the perfect background for those bright berries. Even my husband, who runs from anything that sounds healthy, sneaks these bars when he thinks I'm not looking.
Perfect Berry Selection
Though any frozen berries work here, some combos really shine. Blueberries mixed with raspberries hit that sweet-sour sweet spot, while blackberries add a nice chew. I don't use just strawberries because they get too wet. For a tried-and-true mix, go with equal parts blueberries, raspberries, and blackberries. That big bag of mixed berries from Costco is spot-on and won't break the bank no matter the season.
Make It Your Own
You can switch up these bars however you like to fit what you love or need. Got nut allergies? Swap the almond flour for oat flour, though they'll feel a bit different in your mouth. Toss in some cinnamon or cardamom to the crust for a warm spice kick that goes great with berries. Want something more special? Mix ¼ cup white chocolate chips or chopped nuts into the topping part. In summer, you can use fresh berries instead, but you might need to adjust how much thickener you add depending on how juicy they are.
Serving Suggestions
These bars taste great on their own, but they really stand out with the right pairings. For breakfast, warm them slightly and add a spoon of Greek yogurt for extra protein. As a treat, top with a small scoop of vanilla ice cream or whipped coconut cream. Hosting brunch? Cut them into tiny squares and put them on a tray with fresh berries and mint sprigs. They also travel well for day trips or car rides when wrapped up tight.
 Pin it
Frequently Asked Questions
- → Is it okay to use fresh berries?
Sure! If you have fresh berries, use them. Just keep an eye on the cooking time since they produce less liquid than frozen ones.
- → Can these be vegan-friendly?
Yes, these bars are already vegan-friendly with plant-based goodies like maple syrup and coconut oil.
- → What’s the best way to store the bars?
Use a sealed container and keep them in your fridge. They'll stay good for up to 7 days.
- → How do I ensure these are gluten-free?
Just swap in oats labeled as certified gluten-free, and you’re good to go!
- → What can I replace tapioca starch with?
Arrowroot powder or cornstarch can be swapped in—they work just as well.