
 Pin it
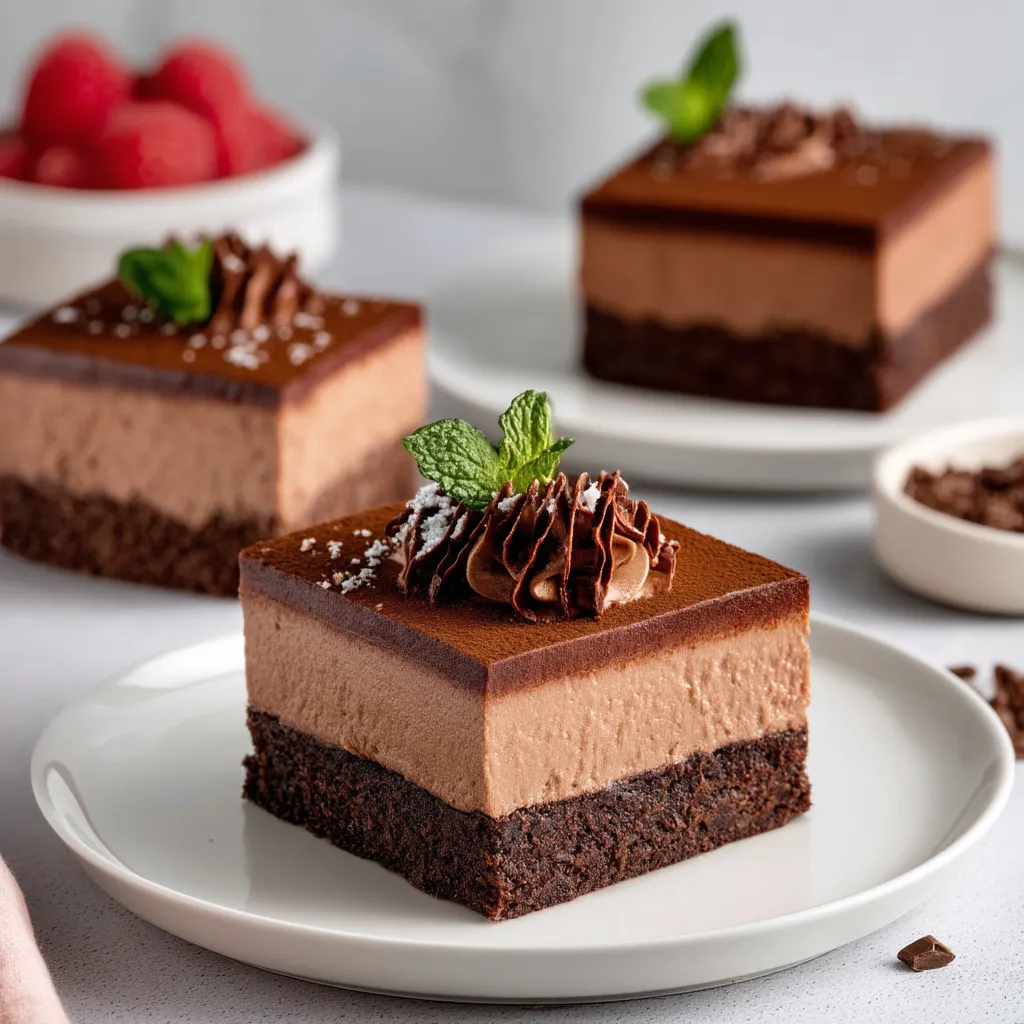
Velvety, fudgy brownies layered with fluffy chocolate mousse and topped with silky ganache make this an absolute treat for chocolate fans. Every bite gives you three amazing chocolate textures - gooey, light, and silky. I came up with this treat during a late-night baking challenge when my friend asked for something with both softness and bite. After trying different versions to get each layer just right, these tasty treats have become what everyone asks for when we celebrate.
The first time I brought these to a family party, my uncle who always said he "didn't care for sweets" ended up eating three slices. Something about mixing that chewy bottom, light-as-air middle, and glossy topping wins over even folks who usually skip dessert. Now my family gets upset if I show up without them!
Essential Brownie Base Components
- Tasty Butter: Makes everything soft and yummy. Always pick unsalted butter that's warmed to room temp for the best mixing.
- Good Cocoa Powder: Gives that true chocolate kick. Dutch-processed tastes smoother and less tangy than regular cocoa.
- Big Eggs: Add body and richness. Eggs that aren't cold mix in much better than ones from the fridge.
- Real Vanilla Extract: Makes chocolate taste even better. The genuine stuff (not fake) really does taste way better.
- Regular Flour: Gives the right structure without getting tough. Scoop it with a spoon into your measuring cup then level it off for the right amount.
- White Sugar: Adds sweetness and helps make that crackly top. Don't try using less or you'll mess up how they turn out.
Crafting Your Delicious Foundation
- Set Up Your Tray:
- Put parchment paper in your 8×8-inch baking pan with extra hanging over two sides. This makes handles so you can lift out the finished brownies easily and stops them from sticking.
- Blend Carefully:
- Stir the melted butter and sugar until they're totally mixed, then add eggs one by one, making sure each one is fully mixed in before adding another. This careful way of mixing makes them super fudgy.
- Stir Lightly:
- Add your dry stuff to your wet mix and stir with a spatula just until you can't see dry spots anymore. Mixing too much wakes up the gluten, which can make your brownies tough instead of soft and gooey.
- Cook Just Right:
- Pour your mix into the ready pan and bake at 350°F for exactly 20 minutes, or until a toothpick stuck in comes out with a few damp crumbs. The brownies will finish cooking a bit as they cool down.
My grandma always told me chocolate treats will forgive mistakes but they never forget when you rush them. She was so right about these brownies - hurrying any part leads to problems like sinking middles or grainy mousse. I once tried to cool them faster in the freezer and got water drops all over my ganache. Now I give each layer all the time it needs.
Amazing Chocolate Layers
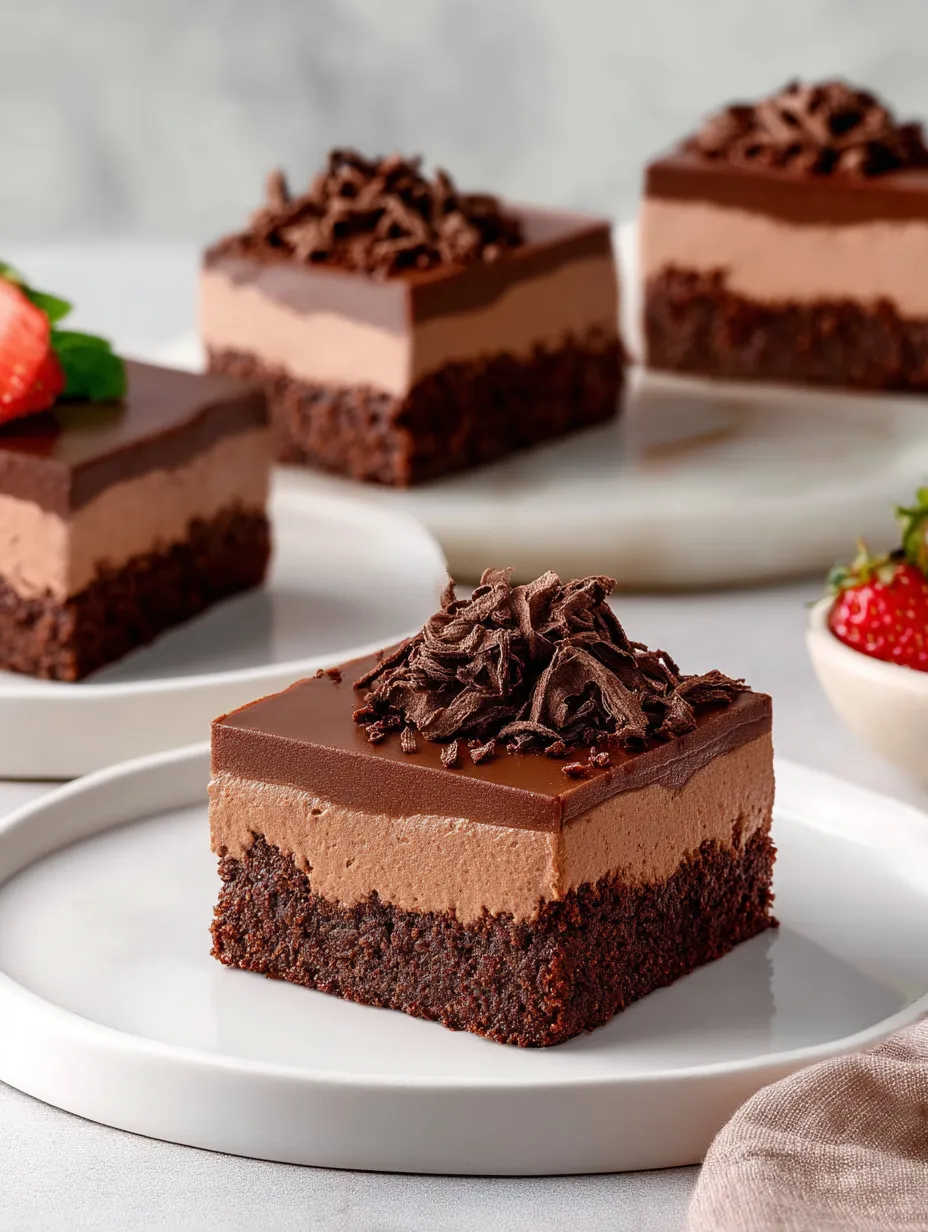
These three-layer brownies turn simple things into something really special. The mix of dense, chewy brownie base with the light, airy chocolate mousse creates an amazing texture combo that makes you want another bite. The ganache on top adds that final fancy touch and strong chocolate taste.
What's really cool about these brownies is how each layer works with the others. The brownie bottom gives structure and that satisfying chew, while the mousse makes each bite feel lighter. The ganache gives that final hit of pure chocolate goodness that stays with you. I found the perfect mix after lots of tries - a thick brownie layer, plenty of mousse, and a thin but mighty ganache coating.
These brownies look as good as they taste. When you cut them, you can see the three clear layers that promise something awesome before you even try them. I've made these for birthday parties, Christmas gatherings, and even a friend's small wedding reception, and everyone loved them.
Great Flavor Matches
These rich brownies taste amazing with strong coffee or espresso. The bitter coffee cuts through the sweetness while making the chocolate taste even better. For fancy occasions, try them with a small glass of port wine for a grown-up after-dinner treat your guests will talk about.
 Pin it
For a fancy dessert plate, put a few fresh raspberries or strawberry slices next to each brownie square. The tangy, fresh berries balance out the rich chocolate layers perfectly. A light sprinkle of powdered sugar over the fruit makes it look prettier and adds a little sweetness.
During summer get-togethers, I serve these brownies with a scoop of vanilla bean ice cream. The mix of warm and cold feels amazing in your mouth, and the vanilla brings out all the chocolate flavors in each layer. This combo always makes everyone at the table smile with happiness.
Different Ways To Make Them
Try a mint chocolate version by adding 1/2 teaspoon of peppermint extract to the mousse part. The cool mint goes great with the rich chocolate and makes this heavy dessert taste fresher. Sprinkle some crushed peppermint candies on top for extra flair.
For coffee fans, mix 1 tablespoon of instant espresso powder in the hot milk before you pour it over the chocolate for the mousse layer. This gentle coffee flavor makes the chocolate taste even better without taking over. Top with chocolate-covered coffee beans for a fancy look.
During the holidays, add some fun by mixing orange zest into the brownie batter and a spoonful of Grand Marnier to the ganache. The bright citrus cuts through the richness and creates a grown-up flavor perfect for special parties or giving as gifts.
Keeping Them Fresh
Keep these layered brownies in a sealed container in the fridge for up to five days. The flavors actually get better and mix together more, making them even tastier on day two or three. This makes them perfect for making ahead when you're having company.
If you want to keep them longer, these brownies freeze really well for up to three months. Cut them into single pieces and wrap each one tightly in plastic wrap before putting them in a freezer container. Let them thaw in the fridge overnight before serving for the best texture and flavor.
When taking them out of the fridge to eat, let the brownies sit out for about 15-20 minutes before enjoying. This slight warming softens the ganache just enough and lets all the chocolate flavors come alive. The difference between the fudgy bottom and fluffy mousse becomes more noticeable at this perfect eating temperature.
 Pin it
I've whipped up these chocolate mousse brownies so many times, and they always bring smiles to everyone who tries them. There's something really wonderful about making a dessert with such clear layers and watching people's eyes light up with that first bite. The mix of textures and the strong chocolate flavor create something truly awesome that turns an ordinary dinner into something folks will remember. Whether you're a baking pro or trying layered desserts for the first time, these brownies are totally worth the effort.
Frequently Asked Questions
- → Do these brownies store well for later?
- Absolutely! These are best made a day or two ahead since the flavors improve as they sit. Keep them tightly covered in the fridge, and pull them out about 15–20 minutes before you’re ready to enjoy for the best texture.
- → Why does the mousse sometimes lose its fluffiness?
- It’s usually because the chocolate wasn't at the right temperature or the cream wasn’t whipped enough. Be sure your melted chocolate is slightly cool but still pourable, and fold it gently into cream whipped to soft peaks to keep the mousse light and airy.
- → Can I freeze these brownie bars?
- Sure thing! Slice them into squares first, then freeze individually in one layer before stashing them in an airtight container. Put parchment between layers if they’re stacked, and let them defrost in the fridge overnight. The mousse might firm up a bit more post-freezing but will still taste great.
- → What’s the best kind of chocolate for this?
- Go for top-notch chocolate in the 55–70% cocoa range. Baking bars melt better than chips (which have stabilizers). If all you’ve got are chips, they’ll work too. Consider darker chocolate (around 70%) for the ganache, and a slightly less intense one (55–60%) for the mousse to create variety.
- → How can I get super neat slices?
- The key’s a hot, clean knife and some patience. Dip the blade in hot water, dry it off, then cut straight down in one motion. Wipe the knife clean and heat it again before each cut. For cleaner, sharper results, chill the whole pan until really firm (or pop it in the freezer for 15 minutes) before slicing.