
 Pin it
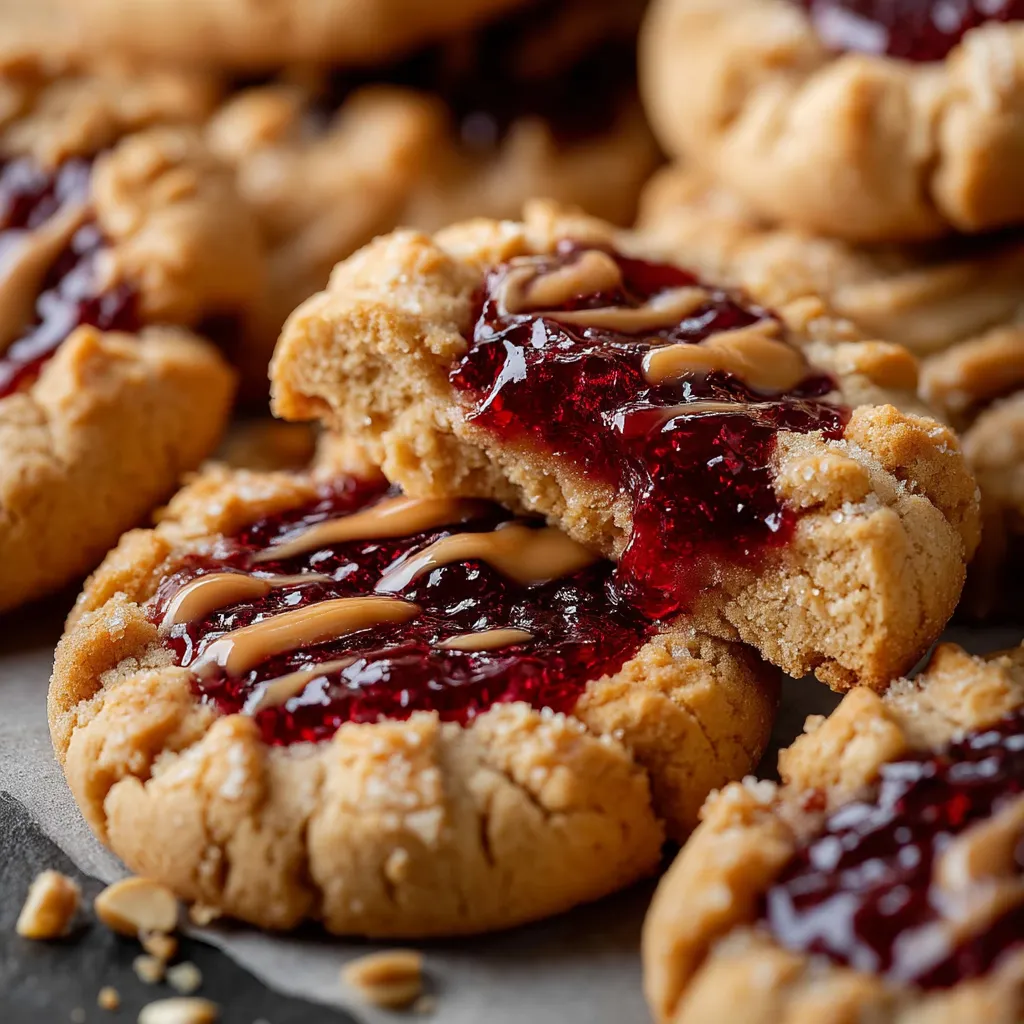
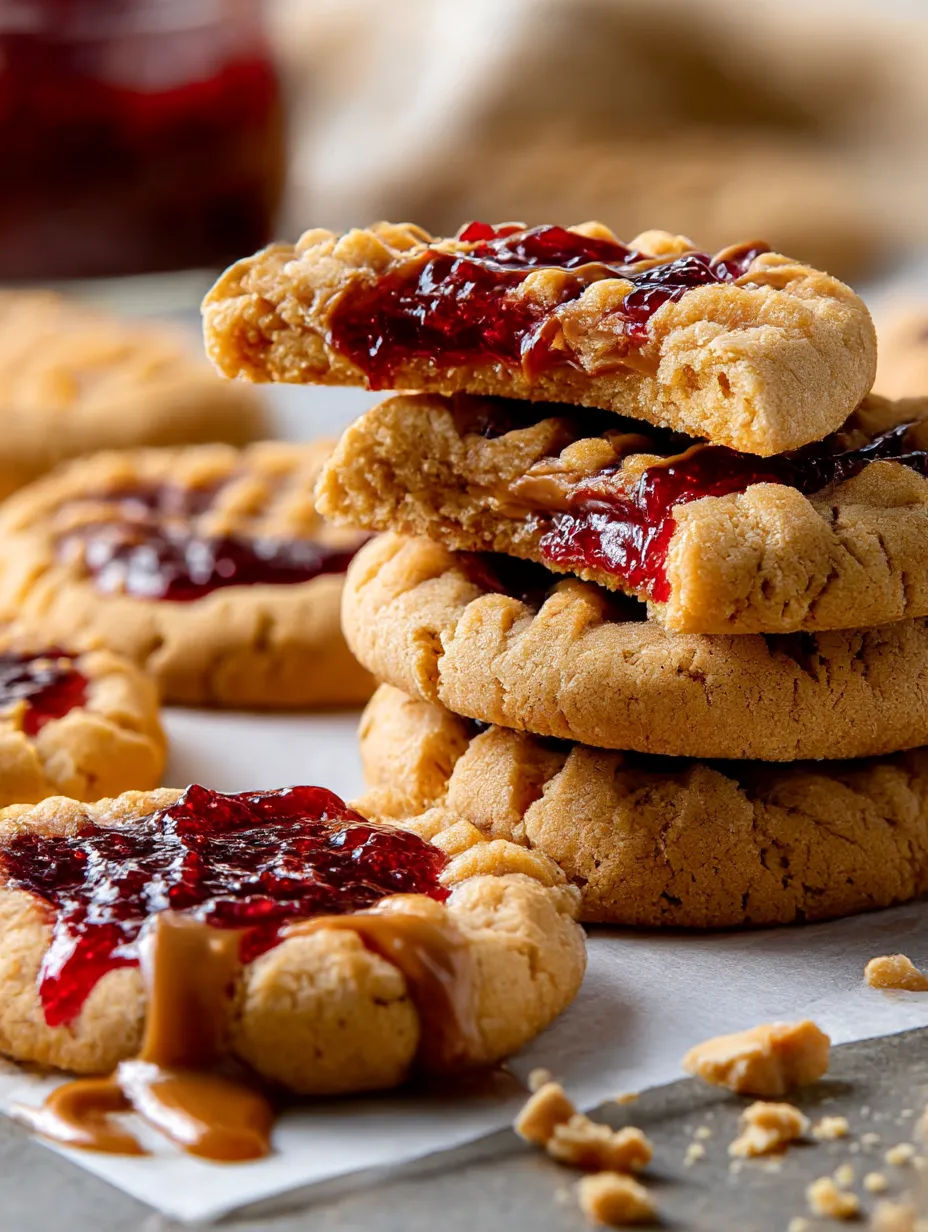
Dig into these peanut butter and jelly cookies that totally nail the vibe of your favorite sandwich but in a soft and chewy snack. The dough comes together quick. They’re loaded with peanut butter, have a shiny jam center, and you don’t have to chill them—meaning your sweet tooth is happy in twenty-five minutes flat.
The first time I whipped up a batch, I just wanted something special for after school. It was so easy and everyone scarfed them down—there wasn’t even a crumb left by morning. Now they’re in the permanent snack rotation.
Tasty Ingredients
- flour: the main stuff that keeps cookies holding together just scoop it and level for the right amount
- brown sugar: this gives them a bit more chew and that sweet, caramel kick push it down in your measuring cup to get the amount right
- egg: sticks everything together and makes the mix smooth let it warm up on the counter first
- baking soda: makes cookies puff up and spread out a little double-check it’s not old
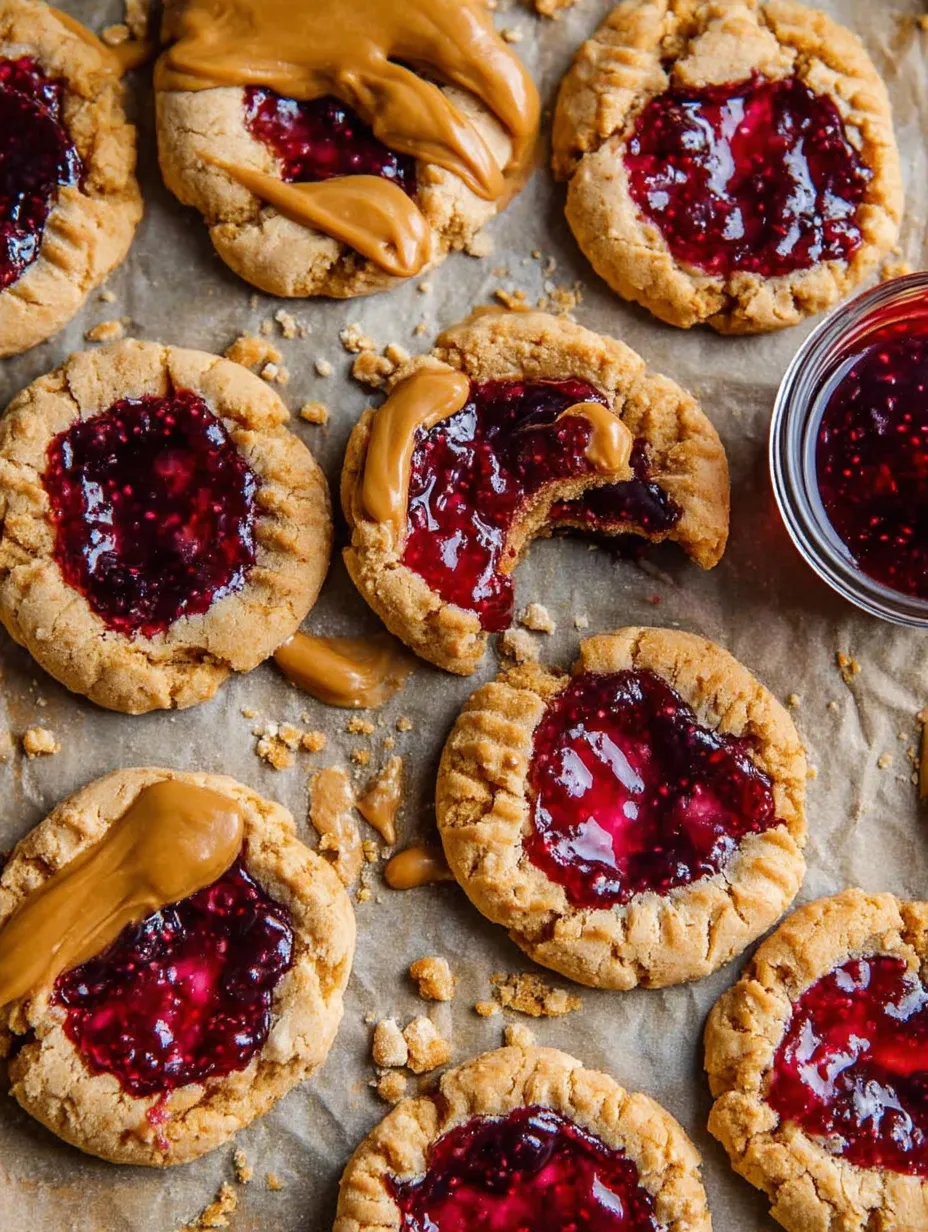
- seedless jam: brings the sweet tang and puts that glossy look on top raspberry and grape are always a hit, but you want a thick one so it doesn’t ooze
- unsalted butter: richly flavors these cookies makes them soft and melt-in-your-mouth
- vanilla: adds a cozy smell and pulls the flavors together real vanilla works best
- peanut butter (creamy works great): this is where all the strong peanut notes come from Jif’s my pick for smooth cookies but crunchy is tasty too
- granulated sugar: helps keep edges crisp and the middle tender super fine sugar mixes in best
- kosher salt: cuts the sweet and punches up flavor try a flaky salt for an awesome finish
- extras like extra jam, melted peanut butter, and chopped peanuts for topping: take things up a notch and make them look awesome on a plate
Simple Step-by-Step
- Add the extra touches:
- If you want, hit them with more jam, a peanut butter drizzle, and some peanut bits on top. Eating them while they’re warm is next level.
- Bake it off:
- Bake in the oven for about thirteen to fifteen minutes. Pull them once the edges are golden. Let the cookies hang out on the tray five to ten minutes so they set up, then move to a cooling rack.
- Jam them up:
- Give your jam a good stir to loosen it up. Drop about a teaspoon of jam right in the center of each cookie dough disc. Try to keep it in the middle so it won’t run everywhere when baking.
- Make and flatten the dough balls:
- Scoop out dough balls about an inch and a half wide. Space them out on the trays so they don’t stick together. Dip a fork in flour or sugar, then squish each dough ball crosswise for that classic pattern. You want them about half an inch thick.
- Mix in the dry stuff:
- Dump the flour in without mixing yet. Rain the baking soda and salt over the top. Stir the top layer with a spoon just a bit, then blend up the rest on low until combined. Don’t go wild with mixing or cookies will get tough.
- Egg and vanilla go in:
- Drop in the egg and pour in the vanilla. Beat it all up until it’s smooth and shiny-looking.
- Blend in peanut butter and both sugars:
- Add brown and white sugar in, beat until it turns pale and fluffy, then add the peanut butter and keep going until it’s totally smooth—no streaks left.
- Work the butter:
- Put your butter in a big bowl or mixer. Turn it on and whip until the butter gets light and fluffy. Make sure you scrape down the bowl so it all blends together.
- Heat up and prep sheets:
- Fire up the oven to 350 F. Line two baking sheets with silicone mats or parchment to help the cookies bake nice and slide right off.
 Pin it
I always think of my mom when I use the peanut butter in these—she’d always sneak a lick off the spoon when baking cookies. The pop of jam on top really makes them look special. At my kid’s last birthday, they reminded everyone of fun childhood treats.
How to keep them fresh
Keep them soft by popping the cookies in a container with a lid right on the counter—they’ll hold up fine for three days. Use parchment between cookie layers if there’s lots of gooey topping so they don’t mash together. For freezing, stack dough balls after pressing them down or freeze the baked cookies, sandwiching them with wax paper in a freezer-friendly bag or box. If you freeze the dough, you can bake cookies straight from the freezer—just add jam and give them an extra minute in the oven.
Swap options
If peanut butter’s not your thing, go with almond or sunflower butter instead, or swap in crunchy peanut butter for more bite. You can use any thick, tasty jam or preserve—apricot and strawberry are both great. If your butter’s salted, just cut down a bit on added salt.
 Pin it
Fun ways to serve
Milk on the side is perfect for these cookies. For a fancy look, stack ’em up and drip some peanut butter over the pile. Kids go wild for these in lunchboxes. Make them bite-sized for trading at cookie swaps too.
Behind the flavors
The inspiration comes straight from the classic PB&J sandwich that so many kids in the US bring to school. Turning that combo into a chewy sweet is straight-up cozy and brings back good family memories for most folks.
Frequently Asked Questions
- → Can I use crunchy peanut butter instead of creamy?
Totally! Crunchy peanut butter brings a bit of bite to the cookies. Both creamy and crunchy are good here.
- → Which type of jam works best for topping?
Look for smooth jams like grape, raspberry, or strawberry. You can use your fave, just skip ones loaded with big fruit chunks.
- → Do I have to chill the dough before baking?
No need to pop the dough in the fridge. You can just go from mixing to baking — easy and quick for soft results.
- → How should I store these cookies for freshness?
Once the cookies are cool, toss them in a sealed container. Leave them on the counter and they’ll stay tasty for about three days.
- → Can the dough be frozen for later use?
Yep, you can freeze pressed-out dough balls. Bake right from the freezer, just tack on a couple extra minutes to bake time.