
 Pin it
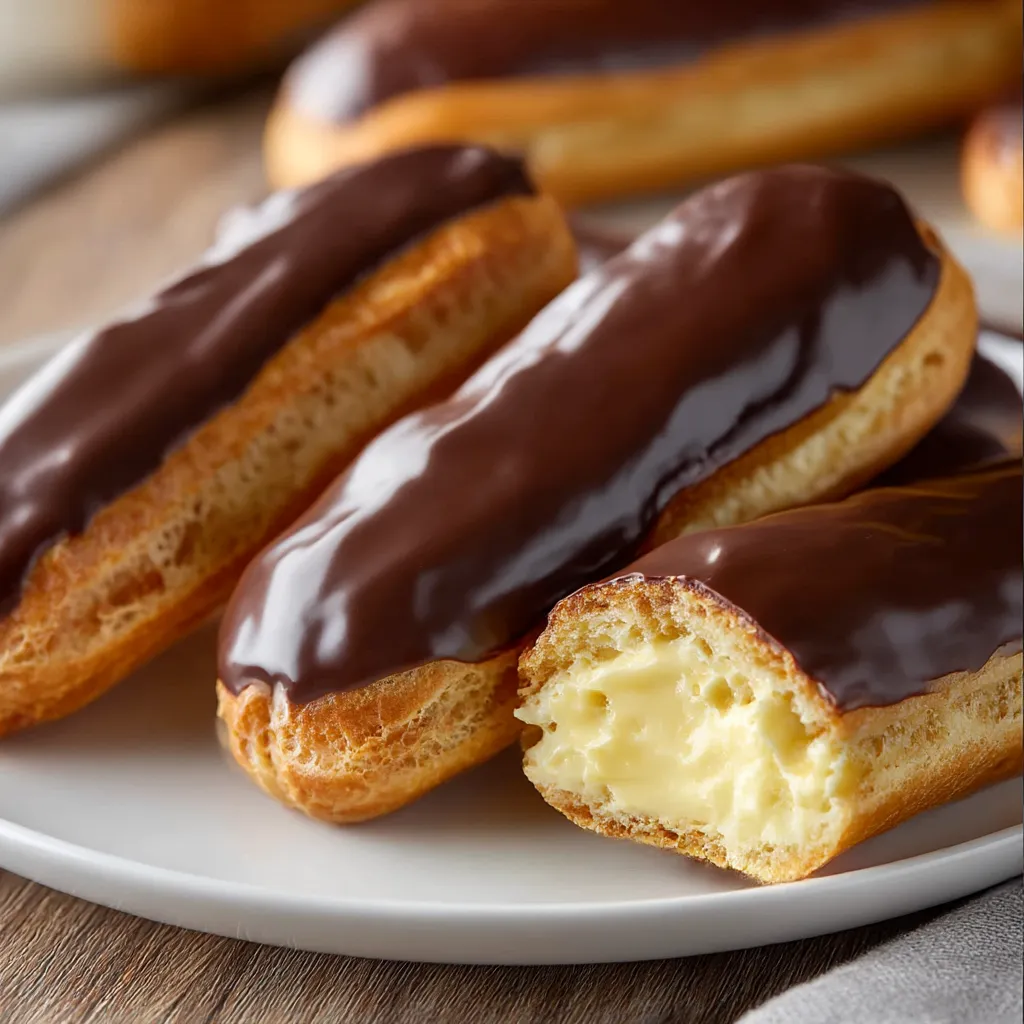
These filling gluten-free éclairs bring fancy French pastry straight to your home kitchen, no matter what food limits you have. After trying this recipe dozens of times, I can tell you these treats give you the same light pastry feel, smooth filling, and shiny chocolate top as the regular kind.
I came up with these éclairs when my niece found out she had celiac disease. Seeing her smile when she took her first bite of an éclair after so long made all the kitchen trials worth it. They've become our family's go-to treat for special days.
Ingredients
For the Gluten Free Pate a Choux
- 1 cup + 3 Tablespoons 1:1 Gluten Free Flour Blend: Builds the right framework. I find King Arthur Measure for Measure does the job really well
- 1/4 cup cornstarch: Makes the airy texture that classic éclairs need
- 4 large eggs: Make sure they're room warm for best lift and shape
- 1 cup water: Makes steam that helps them puff up right
- 7 Tablespoons unsalted butter: Adds good taste and softness to the shell
- 1 Tablespoon granulated sugar: Boosts flavor and helps turn them golden
- 1/2 teaspoon salt: Cuts the sweet and makes all flavors pop
- 1 large lightly beaten egg for egg wash: Gives that pretty gold outside look
For the Vanilla Pastry Cream
- 2 cups whole milk: Makes the creamiest base possible
- 2 teaspoons vanilla bean paste: Tastes way better than plain extract
- 4 large egg yolks: Make it rich and help it thicken up
- 1/2 cup granulated sugar: Adds just enough sweet without going overboard
- 1/8 teaspoon salt: Makes every flavor stand out more
- 3 Tablespoons cornstarch: Gets you that perfect pudding thickness
- 2 Tablespoons unsalted butter: Gives the cream a smooth, silky feel
For the Chocolate Glaze
- 1/2 cup semi-sweet chocolate chips: Hit the right sweet spot
- 1/4 cup heavy cream: Forms a smooth base for your glaze
- 1 Tablespoon unsalted butter: Keeps it shiny and stops it from getting too hard
- 1 Tablespoon corn syrup: Creates that fancy bakery shine look
Step-by-Step Instructions
Prepare Your Workspace
- Step 1:
- First get your oven hot at 425°F and put parchment on a big baking sheet. Draw 4-inch lines about 2 inches from each other, then flip the paper over. This little trick helps you make same-size éclairs without getting ink on your food.
Prep Your Ingredients
- Step 2:
- Mix your gluten-free flour and cornstarch through a sifter to get rid of lumps. This really matters for gluten-free stuff if you want smooth results. In another bowl, beat your eggs lightly so they're ready to go. Warm eggs mix in way better than cold ones.
Create The Panade
- Step 3:
- Put water, butter, sugar, and salt in a pot over medium heat. Keep an eye on it until you see a full boil with bubbles all the way to the edges. Getting this timing just right helps your pastry form correctly.
Cook The Dough
- Step 4:
- Take it off the heat and dump in all your flour mix at once, stirring softly to mix it up. Put it back on low heat and stir hard for about 2 minutes. The dough will clump into a ball and pull away from the pot sides. You'll know it's done when there's a thin cooked layer on the bottom of the pot and the dough looks kind of glossy.
Add The Eggs
- Step 5:
- Move the dough to a stand mixer with the paddle part and let it cool for 10 minutes. Hot dough will cook eggs too soon. Add your beaten eggs bit by bit, about a quarter each time, letting each mix in fully before adding more. The dough might look like it's splitting at first but will smooth out as you mix.
Test The Consistency
- Step 6:
- After you've added 3 eggs, check how your dough looks. Lift the paddle and the dough should make a V-shape and fall off in a thick clump. If it seems too stiff, add more egg. Your dough should look smooth, shiny and keep its shape after piping.
 Pin it
Pipe The Éclairs
- Step 7:
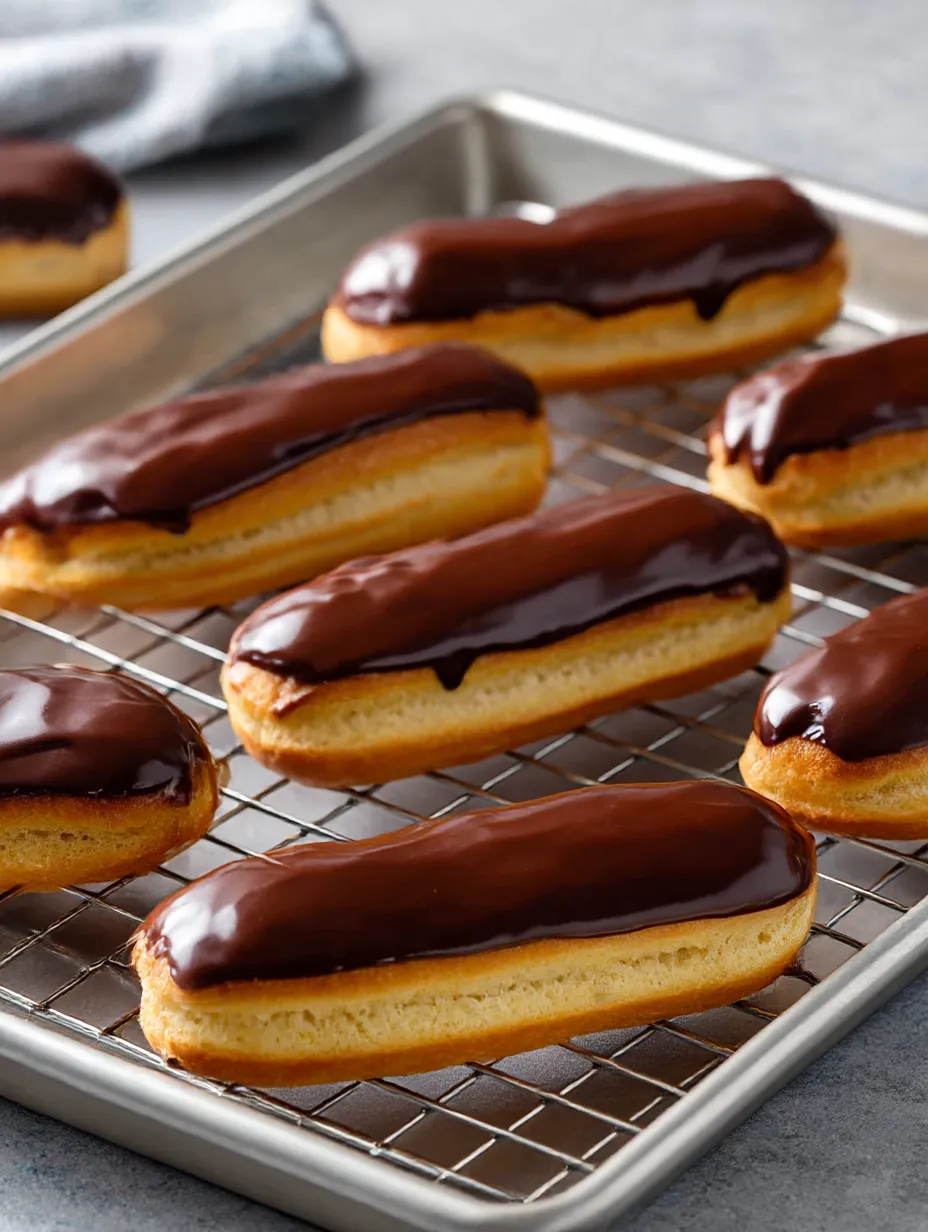
- Put the dough in a piping bag with a star tip or plain tip. Squeeze out 4-inch logs following your drawn lines. If using a plain tip, lightly make lines on tops and sides to help them grow evenly during baking. Brush tops with egg wash to get that nice golden color.
Bake With Precision
- Step 8:
- Bake at 425°F for 10 minutes, then turn down to 350°F for 25 minutes without opening the oven door. This temp switch lets éclairs rise fully before setting their shape. They should turn golden brown and sound empty when you tap their bottoms.
Release Steam And Dry
- Step 9:
- Turn the éclairs over and make two small holes in the bottom of each one. Put them back in the oven for 5 minutes to dry out inside. This stops them from getting mushy after filling. Cool them all the way with holes facing up.
 Pin it
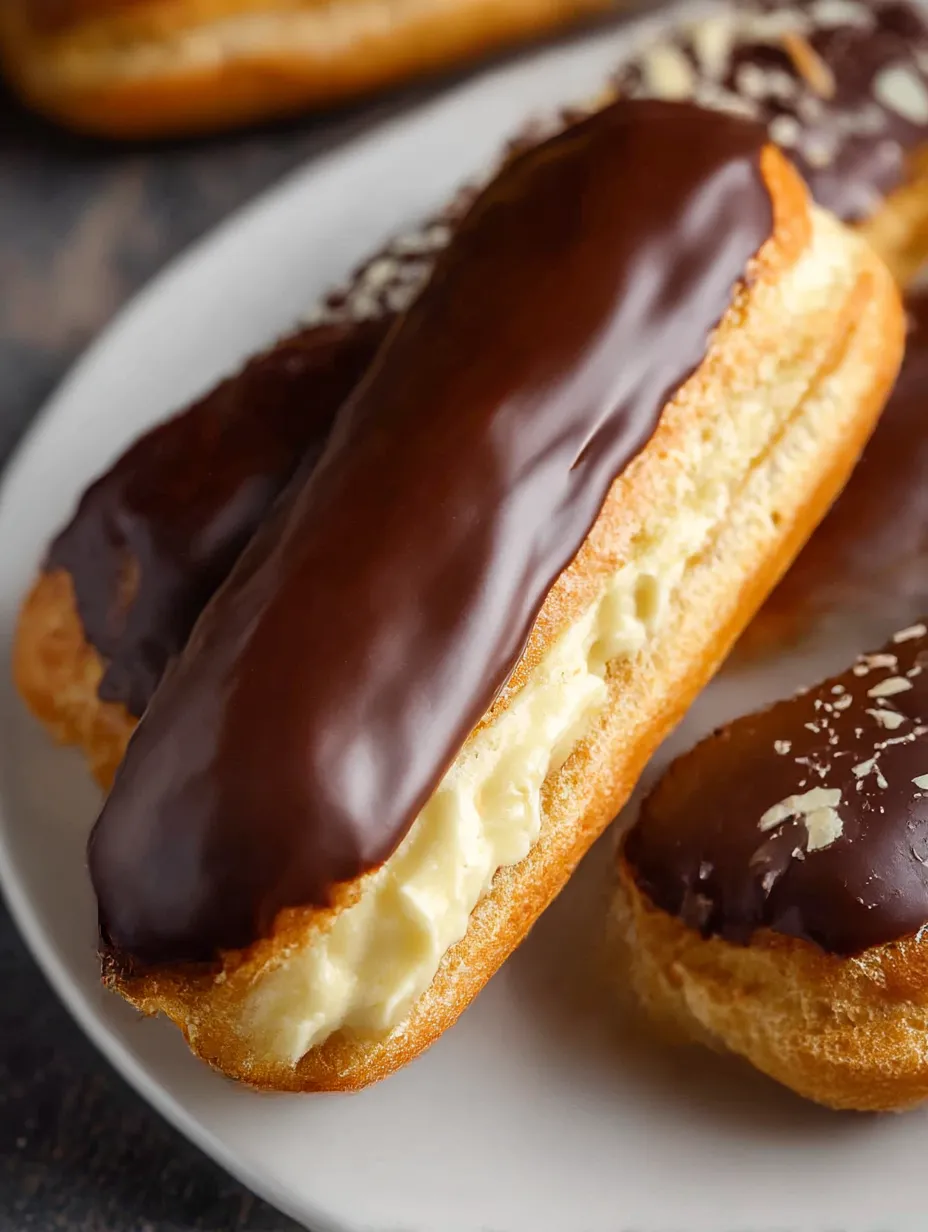
Cornstarch is my hidden trick in this recipe. After trying so many versions, I found this exact mix of gluten-free flour and cornstarch makes the perfect structure that won't sink after baking. My grandma, who baked for a living, wouldn't believe these were gluten-free if she could try them today.
Frequently Asked Questions
- → What helps make the choux pastry light?
Cook the dough fully before adding eggs gradually. The dough needs to be firm but shiny and smooth.
- → Why poke holes in baked eclairs?
It lets out steam, keeping the pastry crisp and preventing it from becoming soft or chewy.
- → Can I change the type of chocolate?
Sure, any chocolate works! Just be mindful that the sweetness will vary depending on the type you pick.
- → How long are filled eclairs fresh?
They taste best within half a day but can be stored in the fridge for up to 24 hours. Keep in mind they'll lose some crispness over time.
- → Can I prep the cream earlier?
Definitely! Make it the day before, but cover it tightly with plastic wrap directly on top to stop it from forming a skin.
- → How do I get a shiny glaze?
Use warm cream to melt the chocolate fully, then mix in butter and corn syrup for a smooth, glossy finish.