
 Pin it
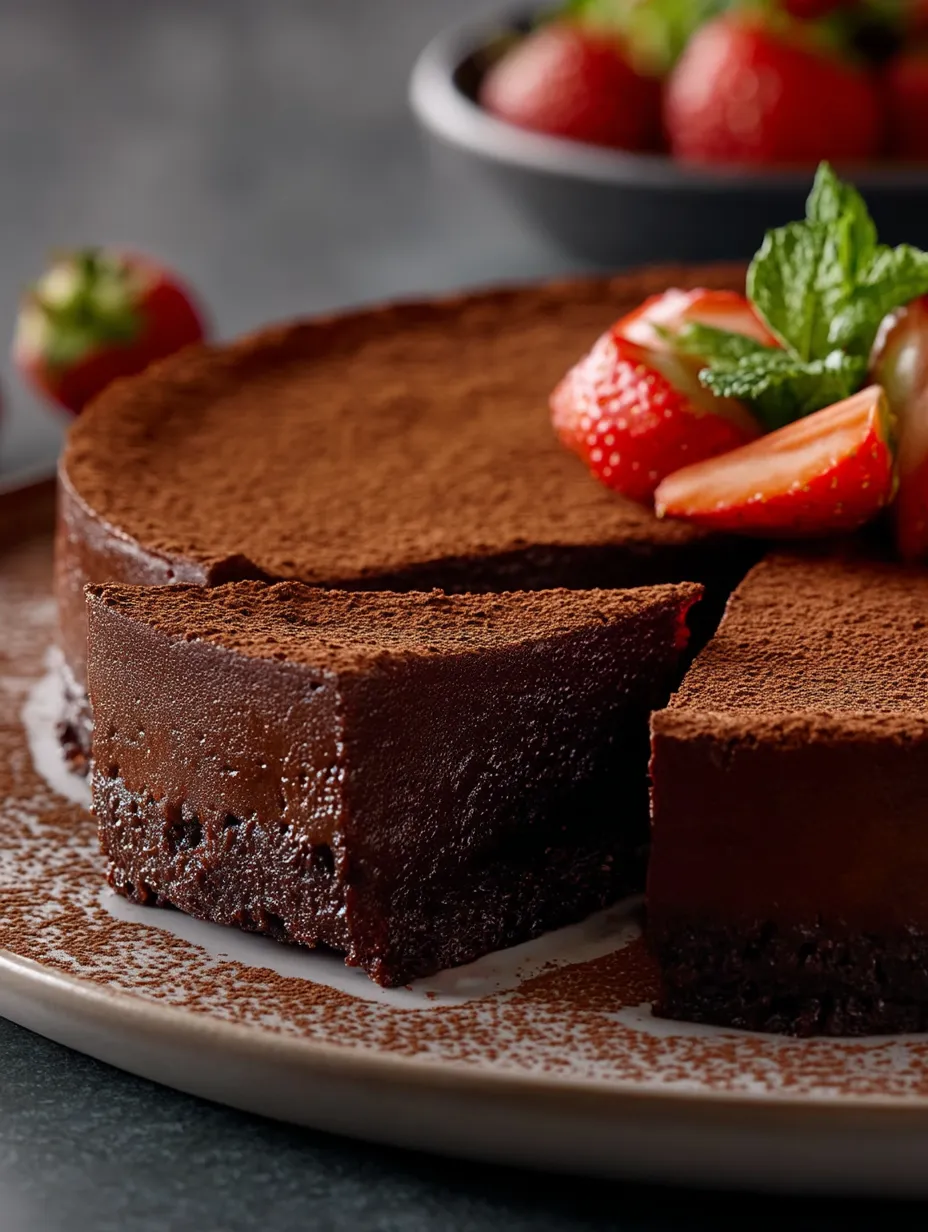
Every bite of this velvety smooth flourless chocolate torte wraps your taste buds in deep, decadent chocolate. The fudgy, melt-in-your-mouth texture comes from skipping flour completely, making this treat irresistibly rich. I whipped this up for my sister's birthday after she found out she had celiac disease - I was worried she'd miss her yearly chocolate cake tradition. Turns out, everyone at the party begged me for the recipe, saying it beat any regular chocolate cake they'd ever had.
I once brought this to a dinner with friends and someone swore I must've gone to pastry school. They couldn't believe that something with such a smooth, dreamy texture was homemade! I just smiled knowing this showstopper comes together with basic stuff and easy steps. That's what's so cool about this torte – it looks and tastes fancy without needing any special skills.
Simple Chocolate Components
- Quality Dark Chocolate: This makes or breaks your torte. Go for something around 70% cocoa for that perfect mix of sweet and deep chocolate flavor.
- Unsalted Butter: Gives that smooth richness you want. European butter works even better if you can find it.
- Fresh Eggs: They hold everything together. Let them sit out a bit so they mix in easier.
- Granulated Sugar: Cuts through dark chocolate's bite. Finer sugar works best for the smoothest results.
- Pure Vanilla Extract: Boosts those chocolate flavors. Skip the fake stuff - real extract tastes way better.
- Sea Salt: Makes chocolate taste more like chocolate. Just a pinch works magic by making sweetness pop.
Making Your Chocolate Dream
- Get Your Pan Ready:
- Start by putting parchment in an 8 inch springform pan and lightly coating the sides with butter. This step makes sure your finished torte slides out perfectly without breaking.
- Mix Carefully:
- Make a homemade double boiler by setting a bowl over simmering water, then slowly melt your chocolate and butter together. Give it a stir now and then until smooth, but watch out - too much heat can ruin the chocolate.
- Beat Until Fluffy:
- In another bowl, mix eggs, sugar, and vanilla until it gets light colored and grows almost twice in size. This adds air that gives your torte just the right texture - not too heavy or too light.
- Mix Gently:
- Slowly fold your chocolate mixture into the egg mixture with a light touch to keep those air bubbles. This gentle approach creates that incredible silky texture everyone will rave about.
My grandma always told me chocolate desserts show off their ingredients more than anything else. I've found that's especially true with this torte - spending a few extra bucks on good chocolate turns it from pretty good to mind-blowing. During Christmas, I make it with special dark chocolate my brother brings back from his trips, and those versions have become legendary in our family.
Decadent Chocolate Delight
This torte shows how something simple can become something amazing. Without flour getting in the way, pure chocolate takes the spotlight, giving you a truly special treat with every bite. The texture sits somewhere between cake and truffle - firm enough to hold its shape but soft enough to melt as you eat it.
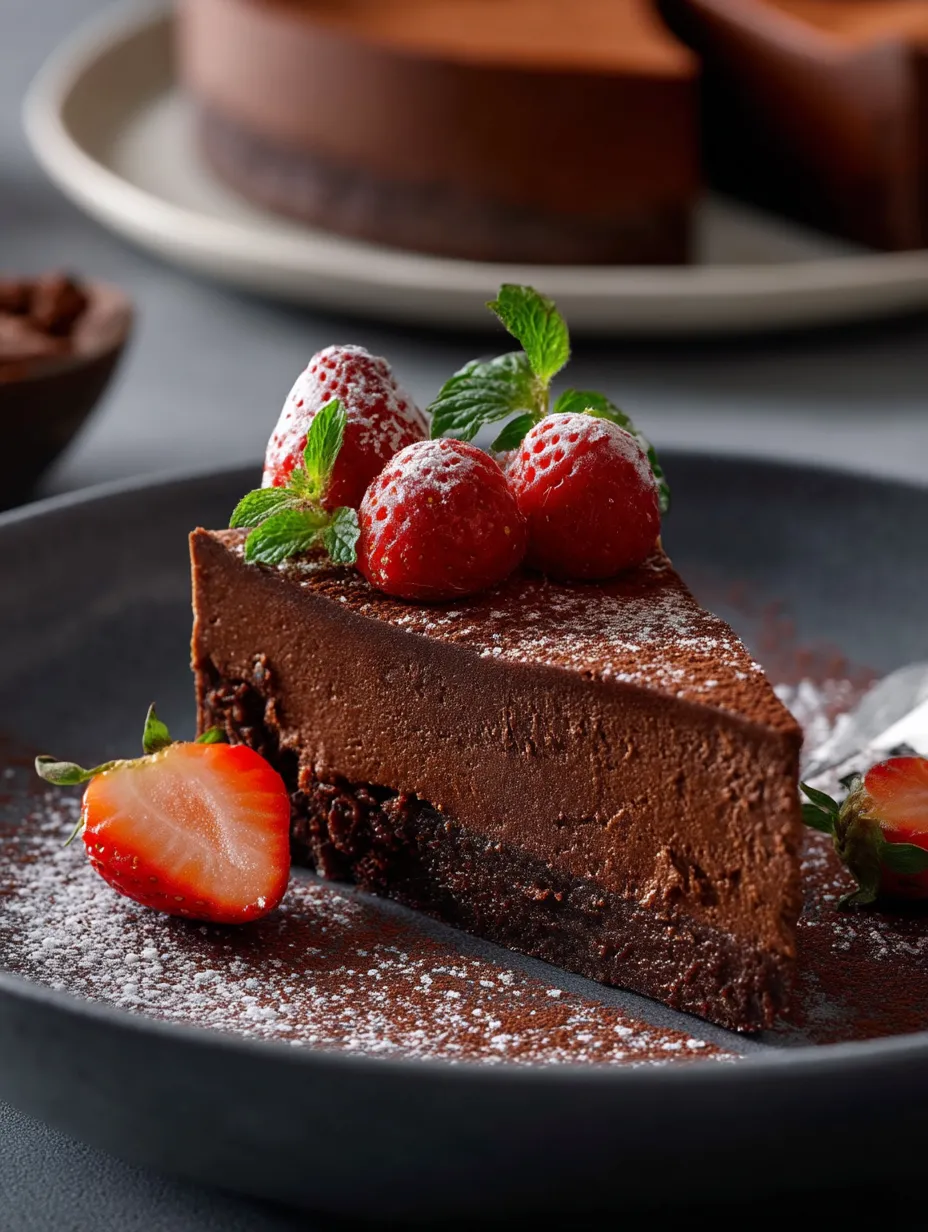
You can serve this dessert pretty much anywhere. I've dressed it up with gold leaf and fresh berries for anniversary dinners, and I've also cut it into little squares for family get-togethers where people grab pieces with their hands while drinking coffee. It always keeps its fancy feel no matter how you serve it.
What really makes this recipe stand out is how timeless it feels. Unlike desserts that come and go with trends, this flourless chocolate torte has stayed popular forever. It has that old European charm but still hits the spot for modern tastes that want real, less processed flavors.
Great Serving Ideas
Cut thin slices of this rich torte and add fresh raspberries or strawberries for a pretty color contrast that tastes amazing together. The tangy berries balance out the richness perfectly. In summer, I often cook down whatever berries look good at the market to make a simple sauce.
Try serving small pieces with espresso or strong coffee for an amazing combo. The coffee's bitter notes make the chocolate taste even better while giving you that hot/cold contrast. When friends come over for dinner, I sometimes put out tiny espresso cups next to the dessert plates to make it extra special.
 Pin it
For birthdays or celebrations, make it extra fancy with a small scoop of vanilla bean ice cream and warm caramel drizzled on top. The mix of cool torte, cold ice cream, and warm sauce creates an awesome eating experience. My brother asks for exactly this combo every single birthday.
Tasty Twists
Make an orange-chocolate version by mixing in zest from one orange and a tablespoon of Grand Marnier before you bake it. The citrus brightens up the deep chocolate flavor and gives it that fancy European pastry shop vibe.
Turn it into a mocha torte by mixing two teaspoons of espresso powder with a tablespoon of hot water and adding it to your chocolate mixture. This makes the chocolate taste even deeper and adds just enough coffee flavor for coffee lovers without overwhelming the chocolate.
For winter gatherings, spice it up with half a teaspoon of cinnamon, a quarter teaspoon of cayenne, and a tiny bit of ground cloves. This Mexican chocolate twist adds a nice warmth that fits perfectly with holiday meals. My friends now specifically ask me to bring this version to our holiday potlucks.
Keeping It Fresh
Keep your torte in the fridge covered loosely with foil instead of plastic wrap since plastic can make moisture build up. It'll stay good for up to five days, though it tastes best in the first three days when you can still enjoy that slight contrast between the barely crisp outside and fudgy inside.
If you want to make it ahead, you can bake your torte up to two days before serving and keep it in the fridge. Just take it out about 30 minutes before you plan to serve it so it can warm up a bit to cool room temperature. This brings out all the chocolate flavor and gives you the perfect texture.
 Pin it
Freeze single slices by wrapping them tight in plastic wrap and then foil before putting them in an airtight container. This way you can enjoy a special treat whenever you want without making a whole torte. Just let it thaw in the fridge overnight and then sit out a bit before eating.
When I first tried making this flourless chocolate torte, I worried it might be too plain with so few ingredients. Would guests think it was special enough? Would they miss that cake-like texture flour gives? Those concerns vanished after the first taste. The strong, pure chocolate flavor and incredibly smooth texture turned a basic dessert into something magical. All these years later, people still ask me for this recipe more than any other, showing that sometimes the simplest things turn out to be the most unforgettable.
Frequently Asked Questions
- → When is the chocolate torte done baking?
- This type of dessert needs to be slightly underbaked for its ideal texture. You'll know it's ready when the edges look firm but the center wiggles slightly when the pan is shaken, like a cheesecake. It sets more as it cools. If you use a toothpick, it should come out with sticky crumbs instead of being totally clean. Be careful not to overbake, as it can dry out.
- → Can I prepare this dessert in advance?
- Totally! In fact, letting it sit after baking makes the flavor even better. Bake it up to three days ahead, cover with foil, and store at room temperature. To keep it longer, refrigerate for up to a week (just bring it back to room temp before serving). You can also freeze it for up to three months—wrap in plastic, then foil.
- → Which chocolate works best for this torte?
- Choose top-quality dark chocolate with at least 70% cocoa for the richest flavor. Since it’s the main ingredient, its quality will make a big difference. Chocolate bars melt more smoothly than chips, though chips can work in a pinch. For variety, mix semi-sweet and bittersweet chocolates or experiment with single-origin options to explore unique flavors.
- → Why did the center of my torte sink?
- It's normal for this dessert to fall slightly as it cools. Because there's no flour to help it hold its shape, the cake rises when baking, then settles. This creates a perfect spot for toppings like whipped cream or fruit. If it collapses too much, your torte may have been undercooked or disturbed by opening the oven early.
- → What pairs best with this torte?
- This dessert is fantastic on its own, but you can elevate it with extras like powdered sugar, whipped cream, or a fruit garnish like fresh berries. For something richer, drizzle caramel, raspberry sauce, or ganache on top. For balance, unsweetened cream or crème fraîche works beautifully. A cup of coffee or dessert wine takes it to the next level!