
 Pin it
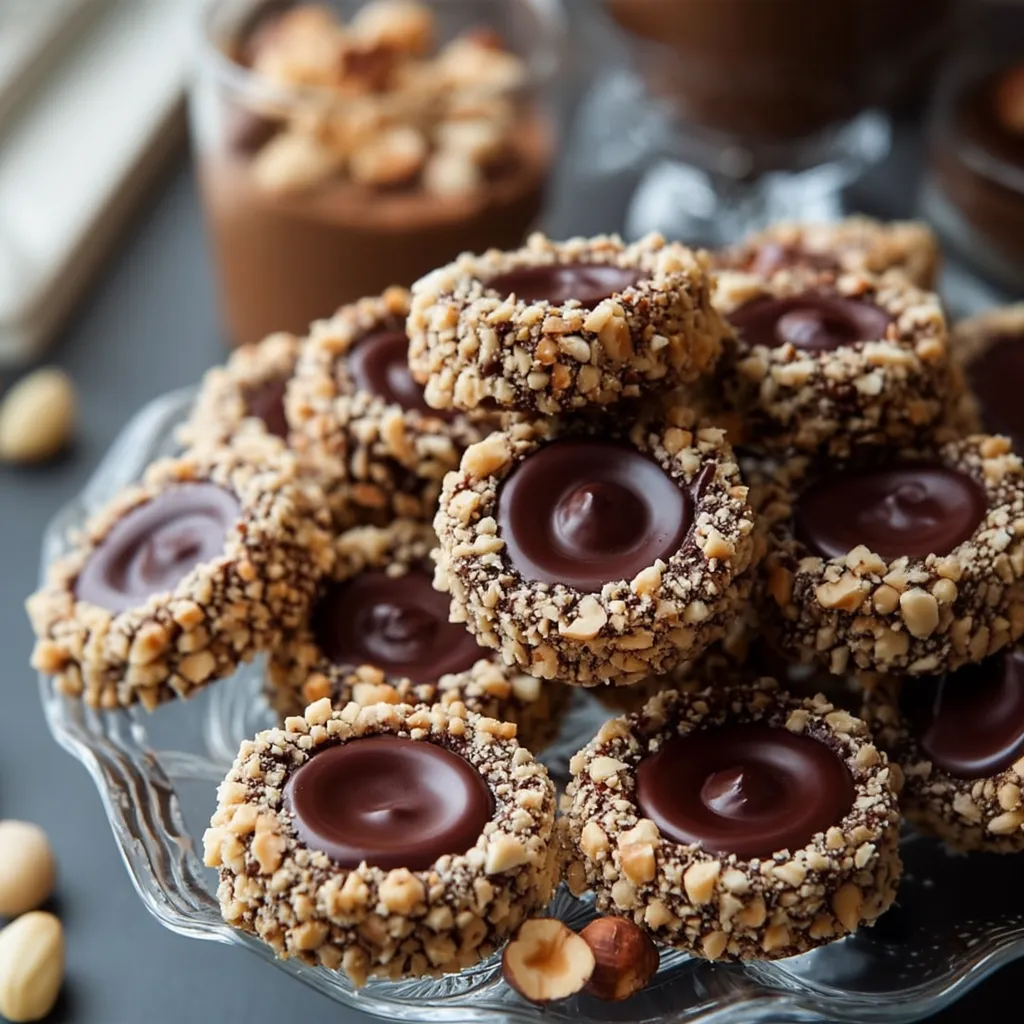
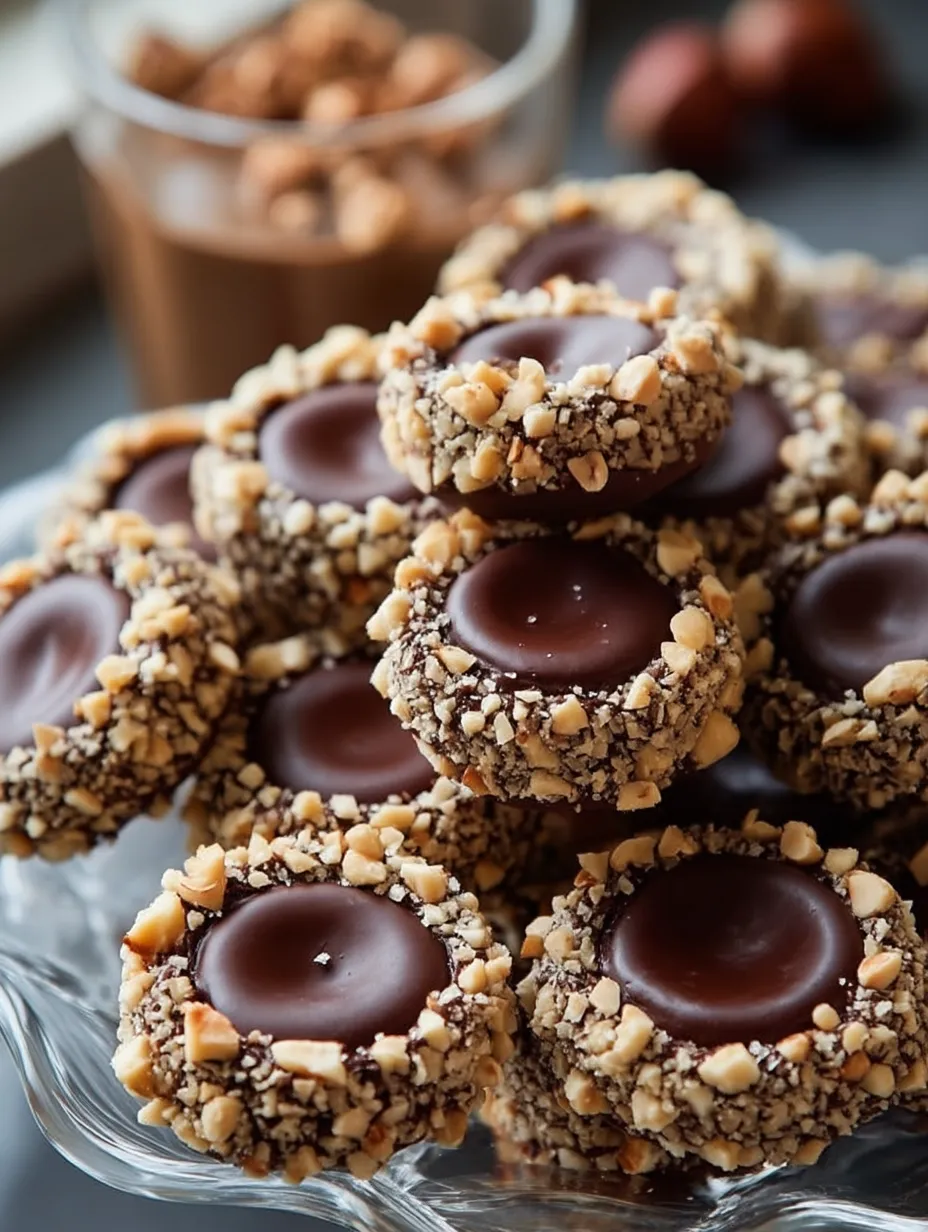
These delectable chocolate hazelnut thumbprint treats blend deep cocoa notes with the smooth luxury of hazelnut spread, creating an irresistible cookie everyone will crave. The soft, chocolaty base perfectly balances with the velvety filling, making a mouthwatering combo that'll win over any chocolate fan.
I whipped these up for a dinner gathering last winter, and they vanished quicker than anything else I served. They've become my go-to contribution at family events, with relatives always asking me to bring twice as many.
Ingredients
- Unsalted butter: brought to room temp so it mixes well with sugar and makes your cookies turn out just right
- Granulated sugar: adds the ideal amount of sweetness that won't take over the chocolate taste
- Vanilla extract: makes the chocolate base taste even better
- All purpose flour: builds the right foundation try to get unbleached for tastier results
- Cocoa powder: gives that rich chocolate flavor go for Dutch processed if you want something smoother
- Salt: cuts the sweetness and brings out more chocolate goodness
- Hazelnuts: chopped up fine to coat the outside and add a nice crunch
- Chocolate hazelnut spread: stuff like Nutella makes the amazing center that everyone loves
- Whole hazelnuts: you can skip them, but they look pretty and add extra crunch
Step-by-Step Instructions
- Preheat and Prepare:
- Turn your oven to 350°F and put parchment on your cookie sheets. This helps your cookies bake the same all over and keeps them from sticking. Don't rush the preheating part for the best results.
- Cream Butter and Sugar:
- Mix your soft butter and sugar for around 3 minutes until it looks fluffier and lighter. This puts air in the dough so your cookies feel just right when you bite them. Then add vanilla and mix it all in.
- Combine Dry Ingredients:
- Mix up the flour, cocoa, and salt really well. This makes sure everything gets spread out evenly in your dough. You can shake the cocoa through a strainer to get rid of lumps for smoother dough.
- Mix Wet and Dry:
- Put your dry stuff into the butter mix bit by bit, about a third at a time, and stir between additions until just mixed. Don't stir too much or your cookies will get tough. Your dough should come together and not stick to the bowl sides.
- Shape Cookies:
- Scoop dough into 1inch balls using a special cookie scoop to make them all the same size. Roll each one in your hands till smooth, then roll in the chopped nuts, pushing a bit so they stick. Put them on your cookie sheets with room to grow.
- Create Thumbprints:
- Push your thumb or a measuring spoon into the middle of each cookie to make a little bowl for the filling. Go about halfway down but don't poke through to the bottom.
- Bake to Perfection:
- Cook cookies for 12 to 14 minutes until the sides feel firm but centers still seem a bit soft. Keep an eye on them at the end because dark cookies can be hard to tell when they're done. They shouldn't look shiny anymore but should still feel a little soft.
- Fill with Chocolate Hazelnut Spread:
- While still warm, check your dents and make them deeper if needed. Put a teaspoon of hazelnut spread in each hole. The warmth will make the spread melt a bit so it's easier to work with. You can put a whole hazelnut on top to make it look fancy.
- Cool and Enjoy:
- Let the cookies sit on the hot trays for 5 minutes before moving them to cooling racks. This gives them time to get firm enough to move without breaking. Wait until they're totally cool before you pack them up or stack them.
 Pin it
You Must Know
My grandma always used hazelnuts in her holiday treats, so this recipe brings back loads of Christmas memories at her house. When I smell the chocolate and hazelnuts cooking, I'm instantly back in her cozy kitchen where I first started learning to bake as a kid.
Make Ahead Options
These treats work great for making before you need them. You can fix the dough and keep it in the fridge for up to 3 days. Just let it warm up for about 30 minutes before you start shaping. You can also freeze the shaped raw cookies for up to a month. When you're ready, you can bake them straight from frozen, just add 2 minutes to your cooking time. For the best cookies, don't add the hazelnut filling until after they're baked, not before freezing.
Ingredient Substitutions
The classic hazelnut flavor is traditional, but you can play around with other nuts if you want. Almonds work really well for both coating cookies and in the filling. If you can't find or don't want to use chocolate hazelnut spread, some melted chocolate mixed with a tiny bit of hazelnut extract tastes great too. If you can't eat gluten, you can swap in gluten free flour mixes for the regular flour, though your cookies might feel a bit different.
Perfect Pairings
These sweet treats go amazingly with coffee or espresso, which helps cut through the richness and brings out the chocolate taste. If you're setting up a dessert table, put them next to vanilla ice cream or some fresh berries to balance out how rich they are. At holiday parties, they go great with other classic treats like shortbread or gingerbread. For a grown-up dessert that really shows off the nutty flavors, try serving them with a small glass of amaretto or hazelnut liqueur.
 Pin it
Frequently Asked Questions
- → Can I swap unsalted butter for salted?
You can! Just leave out the added salt, or adjust it to taste.
- → What other nuts can I use?
Feel free to try pecans, almonds, or walnuts if you'd like to switch it up.
- → How should I keep these fresh?
Store in an airtight container at room temperature for up to 5 days, or put them in the fridge if you need to keep them longer.
- → Can I prep the dough early?
Sure thing! The dough can chill in the fridge up to 2 days or be frozen for a month. Just thaw before using.
- → What can I replace the chocolate hazelnut spread with?
You can swap in any nut butter, some ganache, or even caramel for a creative twist.