
 Pin it
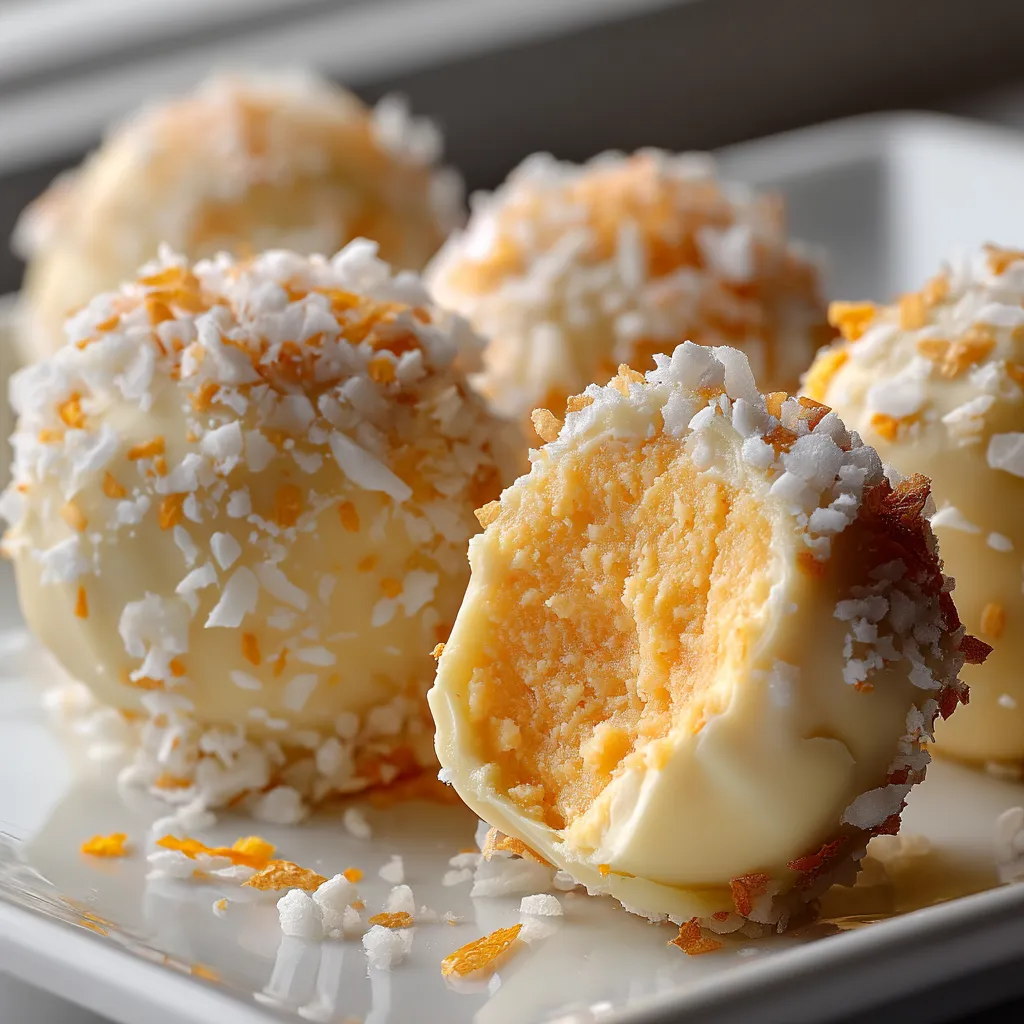
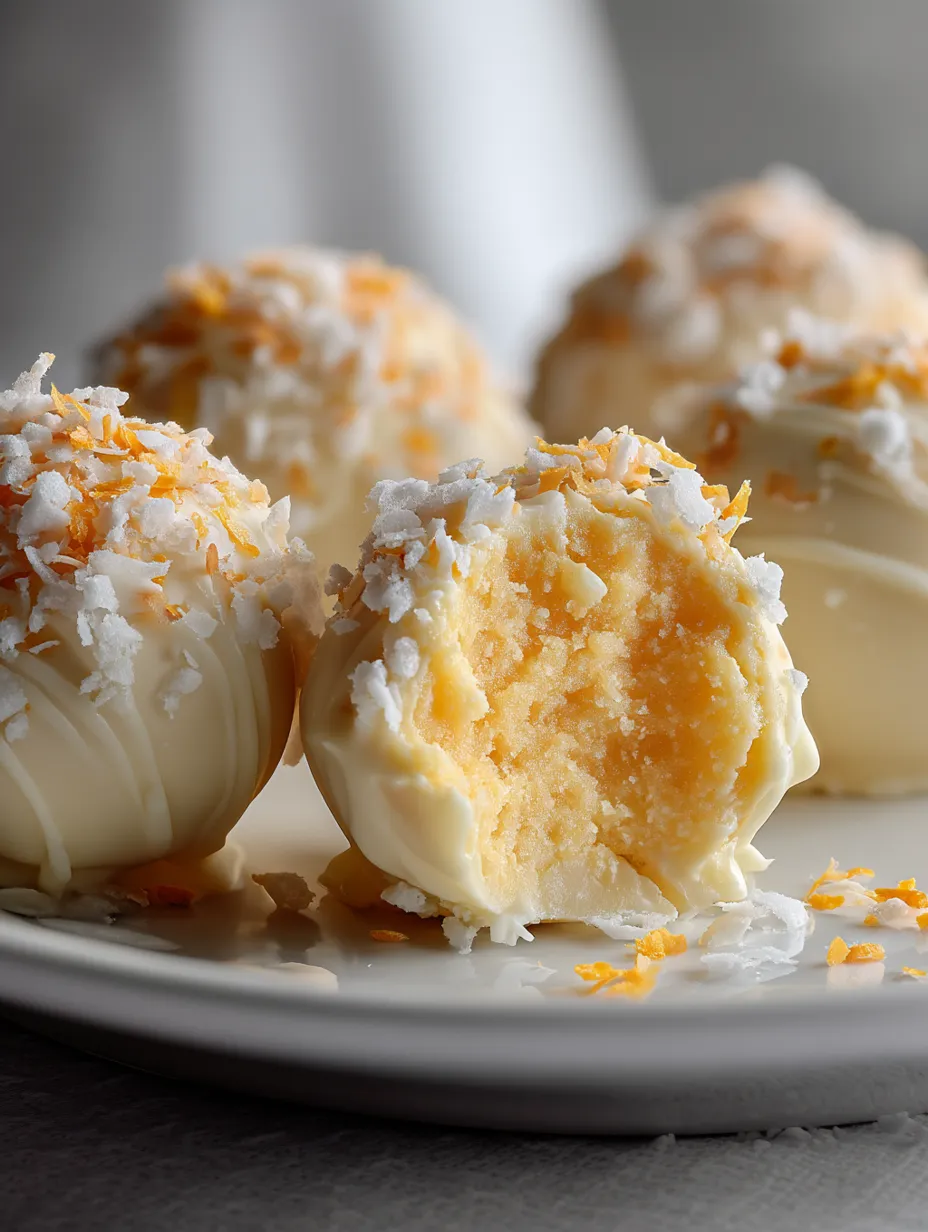
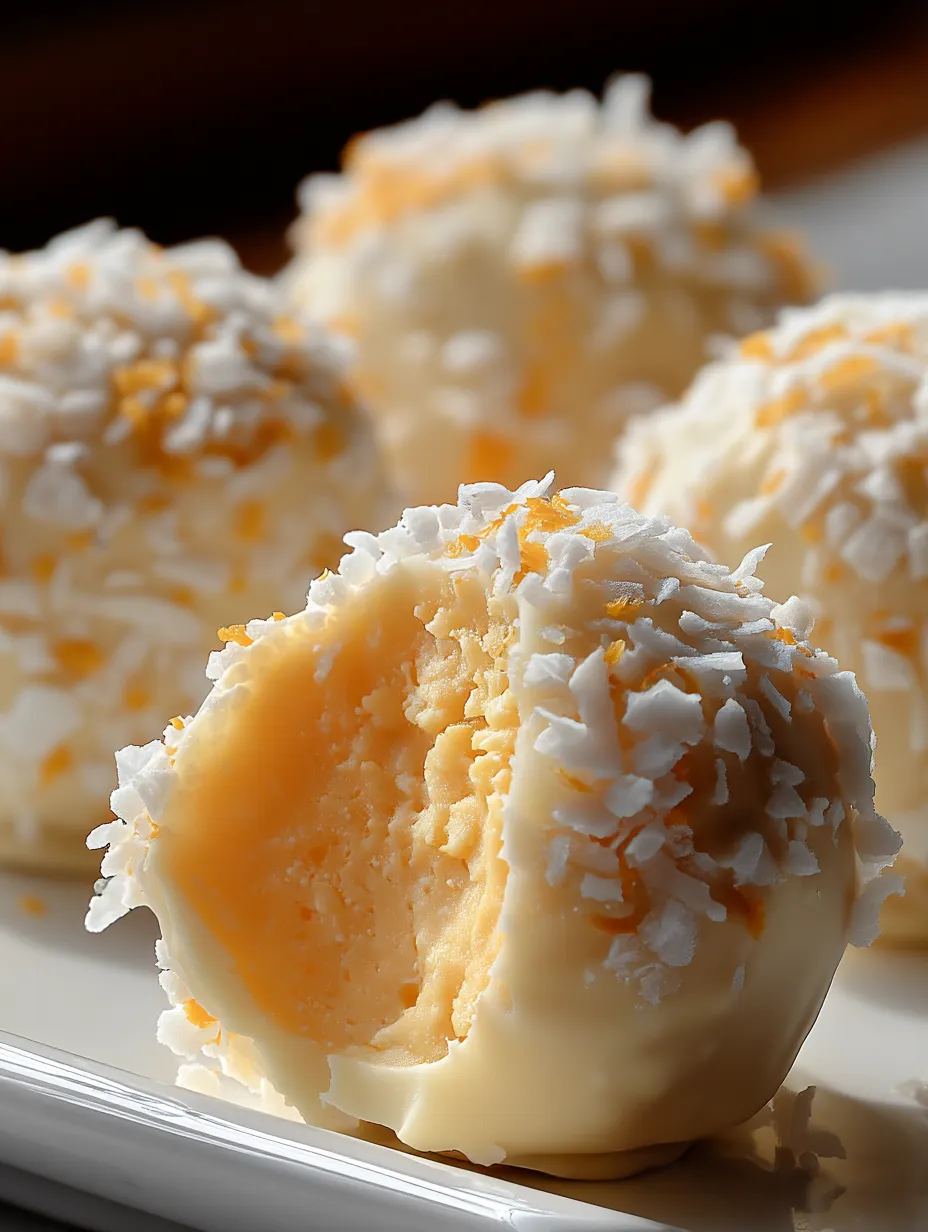
This mouthwatering blend of zesty orange and smooth vanilla comes together in these adorable mini treats. These citrus cream bites bring back that classic summer frozen treat taste without any oven time. The velvety middle wrapped in luscious white chocolate makes a fancy yet fun sweet perfect for any get-together. I came across this idea while hunting for do-ahead desserts for a backyard party, and they got snatched up quicker than everything else I served.
I first whipped these truffles up for my niece's party. I caught the grown-ups sneaking them from the sweet table behind the kids' backs! There's something about that creamy citrus flavor that makes everyone feel young again, but they still look fancy enough for any grown-up dinner party.
Tangy Citrus Basics
- Cream Cheese: Gives that perfect smooth foundation. Go for full-fat stuff at room temp to get the creamiest mix and richest taste.
- Powdered Sugar: Adds both sweetness and body. Run it through a sieve first to get rid of clumps for the silkiest centers.
- Orange Extract: Packs a punch of citrus flavor. Try to find real extract instead of fake stuff for the truest taste.
- Fresh Orange Zest: Boosts the natural citrus kick. Just grab the bright orange outer skin, staying away from the bitter white part underneath.
- White Chocolate: Creates that dreamy outer layer. Pick good quality chocolate with actual cocoa butter in the ingredients for the best melt and flavor.
- Orange Food Coloring: Makes them look amazing. Gel colors work best for bright shades without making the chocolate runny.
Crafting Citrus Delights
- Whip It Good:
- Start with softened cream cheese in a big bowl and beat it until it's totally smooth and light. Using it at room temp means no lumps will hide in your truffle mix.
- Add Sugar Bit By Bit:
- Mix in the powdered sugar little by little while you keep stirring, letting each scoop mix in before adding the next. This careful way stops sugar clouds and makes sure the sweetness spreads evenly.
- Mix In The Flavor:
- Carefully add your orange extract and fresh zest, folding them into your mix with soft movements. The extract gives that signature creamsicle taste while the zest brings brightness and real citrus punch.
- Form With Care:
- After cooling the mix thoroughly, scoop out even amounts using a small cookie scoop or measuring spoon. Roll them quickly in clean hands to make perfect little balls before popping them back in the fridge.
My grandma always told me the key to working with melted chocolate is taking your time and keeping everything dry. I've really found this matters with these truffles – spending extra time to chill the centers fully and watching your chocolate temp carefully makes the difference between pro-looking treats and a messy disaster.
Tasty Little Treats
These citrus cream bites add an unexpected zing to any dessert spread. The mix of tangy orange-filled center and sweet white chocolate coating creates a perfectly balanced nibble that almost everyone loves. I've brought these to casual family cookouts and fancy dinner parties with the same great response.
What's great about these truffles is how flexible they are. They're classy enough for holiday dessert tables but fun enough for a kid's party. The no-bake prep makes them especially handy during those scorching summer days when turning on the oven feels more like punishment than cooking.
The real magic of these truffles is how they take you back to being a kid with just one bite. That special orange-vanilla flavor brings back memories of summer days and ice cream trucks, but the fancy look makes it something special and grown-up. It's comfort food dressed up as fancy candy.
 Pin it
Perfect Companions
These bright truffles taste amazing with a bold coffee or espresso. The sharp coffee taste works well with the sweet citrus flavors, making a balanced after-dinner treat. For special times, try them with a glass of bubbly – the fizz and citrus notes play together wonderfully.
Make a gorgeous dessert platter by placing these truffles next to fresh berries, dark chocolate chunks, and vanilla cookies. The color contrast and matching flavors create a wow-worthy but easy party option. I did this combo at a bridal shower and got so many compliments on both looks and taste.
For an all-citrus dessert table, show off these truffles alongside lemon squares and lime tarts. The different citrus strengths give guests an interesting range to try, with these creamsicle bites offering the sweetest, most crowd-pleasing choice in the mix.
Mix It Up
Try a tropical twist by swapping half the orange extract for coconut extract and rolling the finished truffles in toasted coconut bits. This combo feels like a beach vacation and fits perfectly with summer party themes.
For a grown-up version, mix in two teaspoons of Grand Marnier or Cointreau to the cream cheese mixture. The hint of booze brings out the orange flavor while adding some sophistication. Just remember to mark these as containing alcohol when you serve them.
During holidays, jazz up these truffles with festive sprinkles or colored sugar to match your event. Red and green for Christmas, soft pastels for Easter, or team colors for game watching parties – the white chocolate outside works great as a blank canvas for any seasonal touch.
Keeping Them Fresh
Keep your finished truffles in the fridge in one layer in a sealed container. Put wax paper between layers if you need to stack them to stop them from sticking or damaging the delicate chocolate coating.
If you want them to last longer, these truffles freeze really well for up to three months. Let them thaw in the fridge overnight before serving for the best texture and taste. This make-ahead option makes them perfect for preparing way before special events.
 Pin it
When you're ready to eat them at room temp, take them out of the fridge about 15-20 minutes before serving. This slight warming lets the flavors really come alive and the center reach that perfect creamy feel that makes these truffles so hard to resist.
I've created these citrus cream truffles countless times, and they always wow everyone. What I love most is how they turn basic ingredients into something that feels special and handmade. There's something really satisfying about making these little joy bombs and watching people's faces light up when they taste that surprising burst of bright orange wrapped in sweet creaminess. Whether you're giving them as gifts, serving guests, or just treating yourself, these truffles bring a little happiness in every bite.
Frequently Asked Questions
- → Can I make these ahead for an event?
- Of course! They're great for preparing ahead. Store them in a sealed container in the fridge and they'll stay fresh up to a week. For the best look, I suggest making them just 2-3 days before serving. Let them rest at room temp for about 15 minutes before enjoying for maximum flavor and texture.
- → How do I melt white chocolate without ruining it?
- White chocolate burns fast, so go slow! Use the microwave on half power in short increments of 20 seconds, stirring each time. Stop while some pieces remain and stir until smooth. Another option is putting a heat-safe bowl over a pan with barely simmering water, stirring constantly (make sure the bowl doesn’t touch the water).
- → What can I use instead of frozen orange juice concentrate?
- If concentrate isn't available, try reducing fresh orange juice by simmering it until it's thick (around a fourth of the volume) and cooling it. Another idea is blending a tablespoon of fresh orange juice with 2-3 tablespoons of orange marmalade and orange extract for that tangy punch.
- → Why is my mixture too soft to roll?
- If your truffle mix is too mushy, it might be because the butter was too warm or there's extra liquid. Chill it for 30 minutes in the fridge and try again. If it's still too sticky, mix in small amounts of powdered sugar or crushed cookies until it’s easy to handle.
- → How do I make these gluten-free?
- Switch the vanilla wafers with gluten-free versions or graham crackers. Crush them finely. Double-check that the white chocolate is also gluten-free, as some brands might include additives or be processed with wheat.