
 Pin it
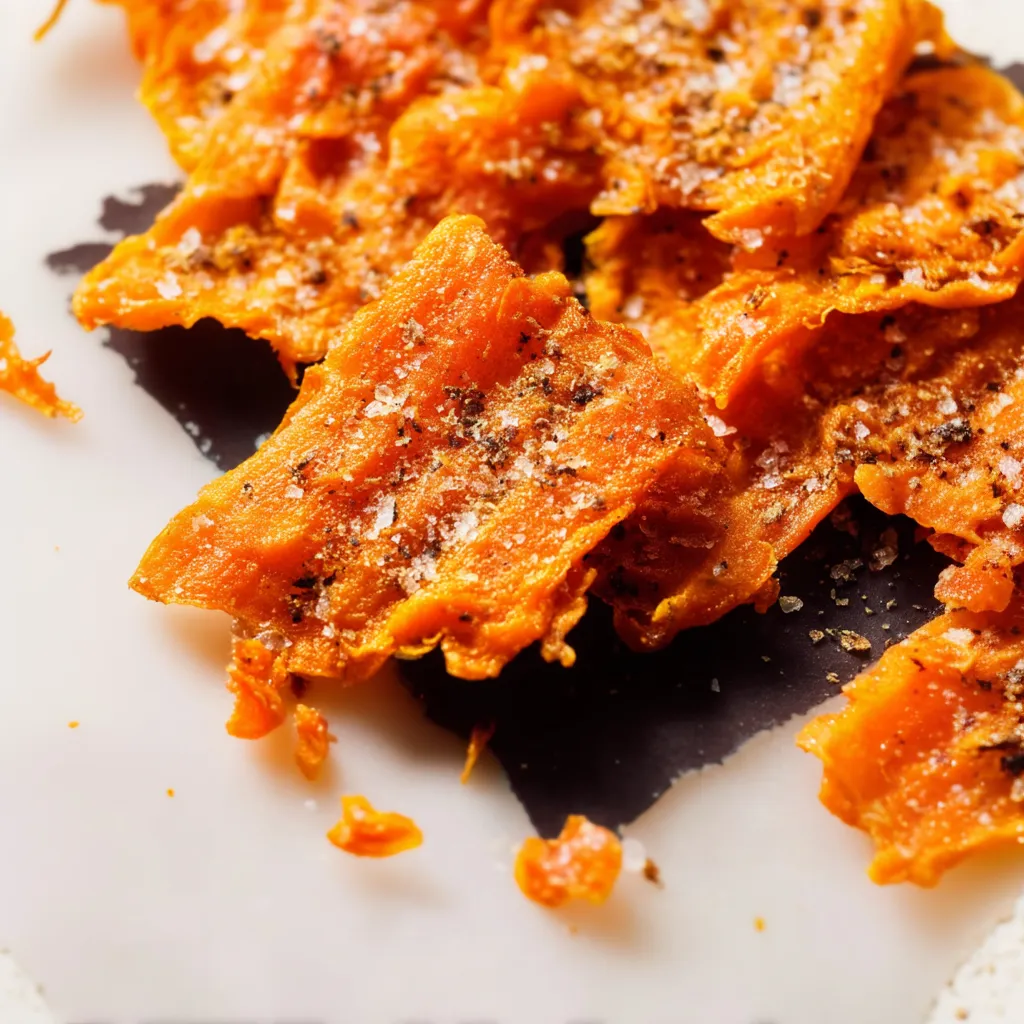
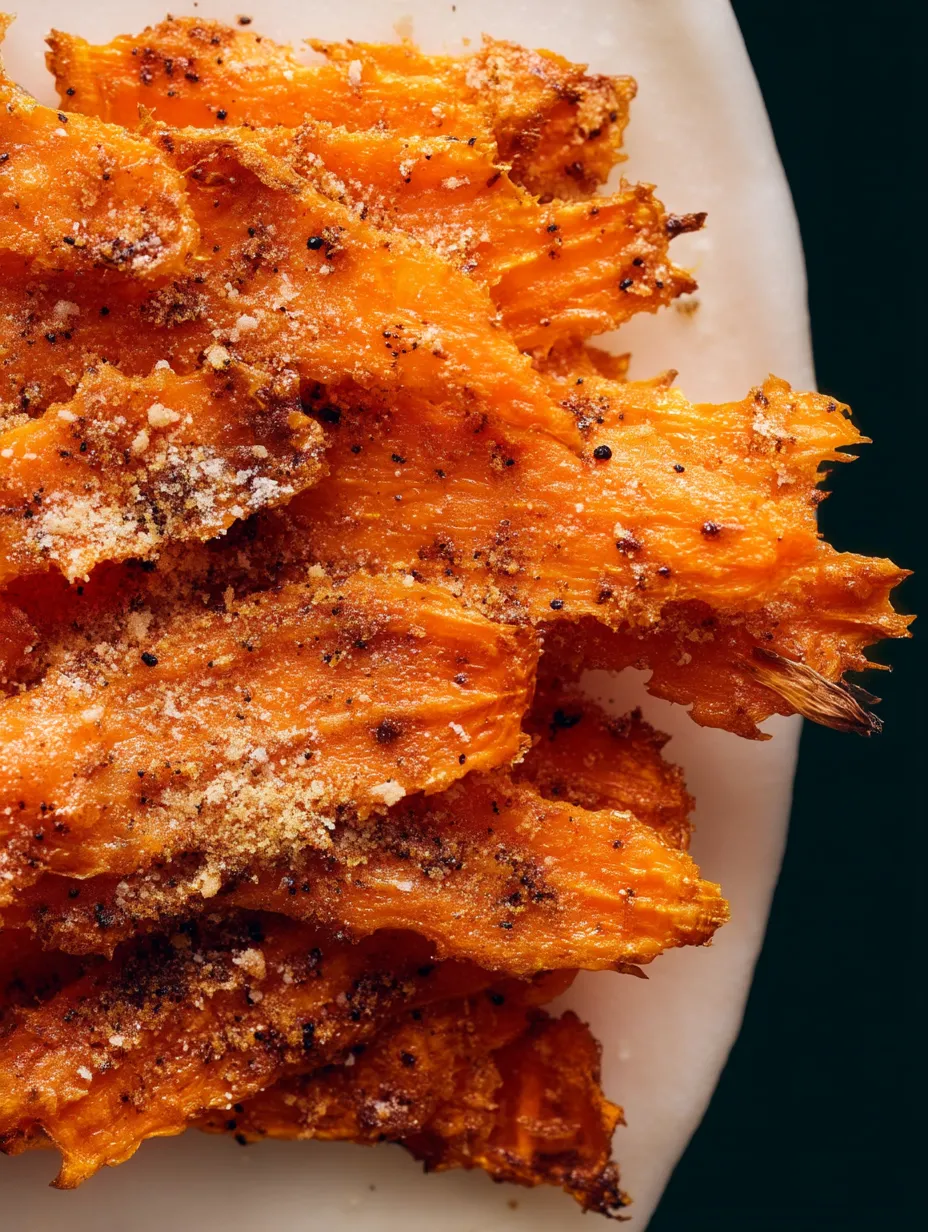
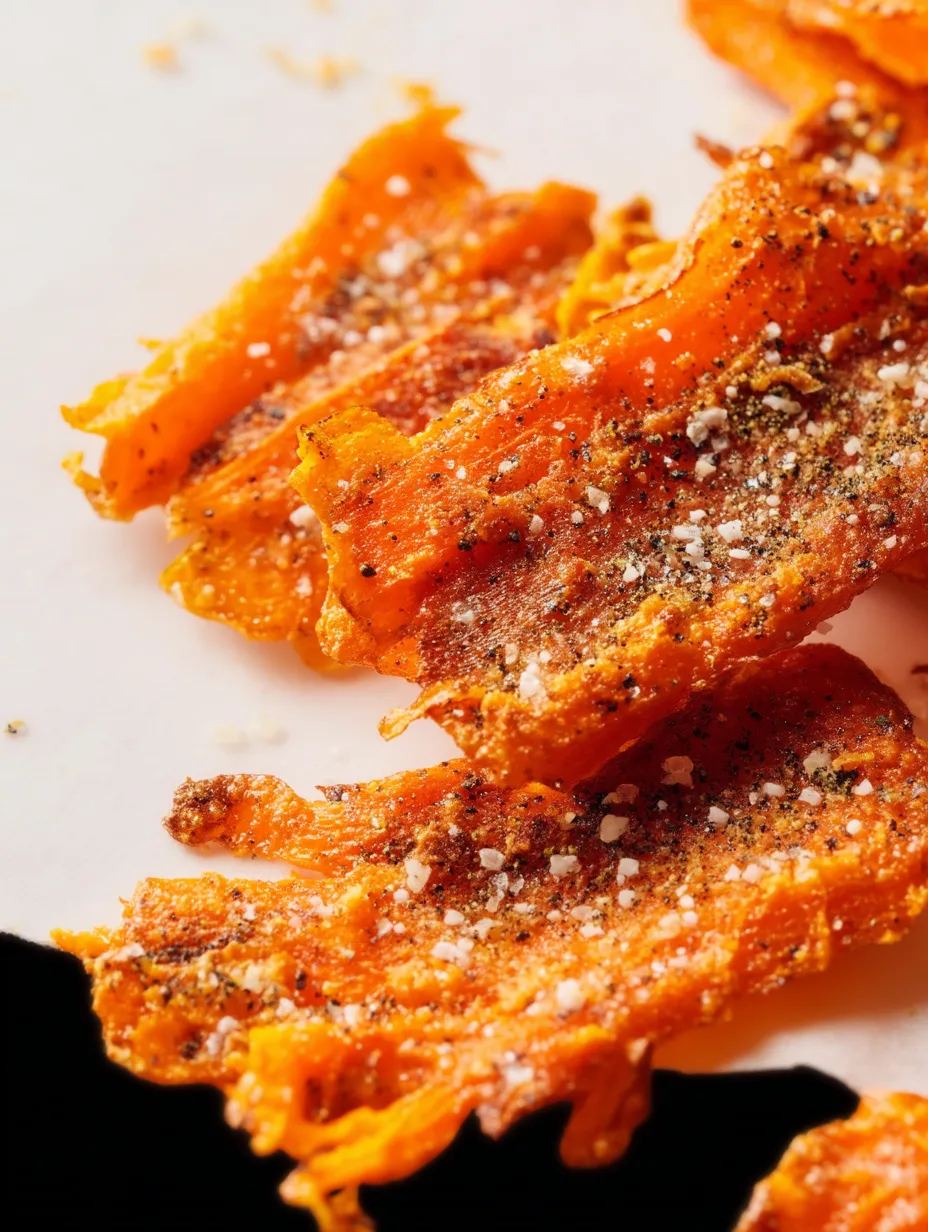
These flattened roasted carrots take a common veggie and turn it into a knockout side with crunchy edges and soft middles. The flattening method creates more space for browning, which brings out intense sweetness and gives you amazing texture in each mouthful. Combining earthy Parmesan, fragrant garlic, and rich olive oil brings out the carrot's natural goodness, while the two-stage cooking - boiling then high-temp roasting - makes sure they're perfectly tender inside with golden, crisp outsides. These bright orange bites go well with almost any main course, yet pack enough flavor to enjoy on their own as a tasty snack that'll win over even the biggest veggie doubters.
I stumbled on this method during some kitchen playtime when I was bored of serving the same old sides night after night. When the first batch vanished quicker than any veggie dish I'd ever cooked, I knew I had something good. My veggie-hating nephew was caught grabbing extras from the plate, and now my partner always asks for "those crunchy carrot things" at dinner. What I love most is how this easy prep completely changes an ordinary veggie into something that feels fancy without needing weird ingredients or tricky cooking steps.
Basic Ingredients
- 1 pound fresh carrots: Forms the sweet, natural base of this dish
- 2 tablespoons olive oil: Helps make that must-have crunchy, browned outside
- ¼ cup grated Parmesan cheese: Brings rich flavor and helps with browning
- 1 teaspoon garlic powder: Adds warm flavor without burning like fresh garlic would
- ½ teaspoon salt: Boosts the natural sweetness and other tastes
Your carrot quality really matters for this dish. Go for firm, bright-colored ones without soft spots or splits. Thicker carrots work best since they give you more surface to flatten. While those bagged baby carrots can work in a hurry, whole carrots taste better and have nicer texture for this cooking style. With the Parmesan, freshly grated gives the best taste and melts better, though the pre-shredded stuff works in a pinch. The olive oil isn't just for cooking - it adds flavor too, so try to use good extra virgin olive oil to make everything taste better.
Easy Steps
- First Cooking Step:
- Start by washing and peeling 1 pound of carrots, getting rid of any dirt and the outer skin. Take a sharp knife and cut them into 2-inch chunks with similar thickness so they'll cook evenly. For really thick ends, you might want to split those parts lengthwise first. Put your carrot pieces in a medium pot and add cold water until they're covered by about an inch. Starting with cold water helps cook them more evenly from the center out. Put the pot on medium-high heat and bring it to a light boil. Once it's boiling, turn down the heat to keep a gentle simmer and cook for around 10 minutes. They're done when a fork slides in with just a bit of resistance. Don't let them get too soft now, since they'll cook more in the oven, and overly soft carrots might break apart when you flatten them.
- Drying and Cooling:
- When your carrots reach that perfect tenderness, carefully pour them into a colander, giving a gentle shake to get extra water off. Let them sit and steam-dry for about 5 minutes. This cooling time does two things: it lets some moisture evaporate, which helps them get crispier later, and makes them easier to handle when you flatten them. While they cool, heat your oven to 400°F (200°C) and line a baking sheet with parchment paper. The parchment stops sticking and makes cleanup easier while giving you an even cooking surface. For even better results, you can put the baking sheet in while the oven heats up, which will give the carrots a head start on crisping when they hit the hot surface. As the oven warms and carrots cool, mix up your seasonings so everything's ready for the next part.
- Adding Flavor:
- In a medium bowl, mix 2 tablespoons olive oil, ¼ cup fresh grated Parmesan, 1 teaspoon garlic powder, ½ teaspoon salt, and ¼ teaspoon black pepper. Stir until everything's well combined. The oil helps everything stick to the carrots and helps them brown. Add your slightly cooled carrots to this mix and gently toss until they're all coated evenly. Use a spatula to scrape the bowl sides so you don't waste any of the tasty coating. The warm carrots will slightly melt the Parmesan, helping it stick better and making a paste-like coating that'll crisp up nicely in the oven. This coating turns simple boiled carrots into a crispy, flavorful side with complex textures and tastes.
- Flattening Method:
- Put your coated carrots on the baking sheet, arranging them in a single layer with a little space between each piece so air can flow around them and they'll brown evenly. Take a flat-bottomed glass, measuring cup, or jar and press down firmly on each carrot to flatten it to about ¼-inch thick. The best tool for this job has a flat bottom wider than your carrot pieces - you can wrap it with parchment or lightly oil it if things get sticky. You want flattened pieces with uneven edges that'll get super crispy while still having some thickness in the middle. Don't worry if some break apart a bit - those smaller pieces will get extra crunchy and delicious. Try to press with the same force so all pieces end up roughly the same thickness and cook at the same speed. This flattening trick creates that contrast between crunchy outside and tender inside that makes this dish so good.
- Oven Cooking:
- Put your tray of flattened, seasoned carrots into your 400°F preheated oven, on the middle rack for even heating. Cook for about 20 minutes, until the bottoms start turning golden brown. Then, using a thin spatula, carefully flip each carrot piece over for even browning on both sides. Put them back in the oven for another 15-20 minutes, until the edges are visibly crispy and browned and the centers are tender. The exact time might change based on your oven and how thick your flattened carrots are, so start checking after 15 minutes post-flip. For extra crispiness, you can put them under the broiler for the last 1-2 minutes, watching carefully so they don't burn. Take them out and, while still hot, sprinkle with another tablespoon of fresh grated Parmesan and a light sprinkle of flaky sea salt if you want. This final touch adds more flavor and texture to your finished dish.
I've made tons of veggie sides through the years, but these flattened crispy carrots always get the biggest wow from family and friends. What amazes me most is how they turn even stubborn veggie haters into carrot fans. The first time I made them for company, a friend who said he "couldn't stand cooked carrots" tried one just to be nice and ended up eating almost half the plate. The mix of crispy edges, soft centers, and savory Parmesan coating creates something way better than the sum of its parts - showing that sometimes the easiest cooking methods give the most impressive results.
 Pin it
Great Food Companions
Make your meal planning easier by thinking about main dishes that go great with these crispy flattened carrots. For a comforting dinner, serve them with a moist roasted chicken where the carrots' caramelized sweetness plays off the savory chicken beautifully. These carrots also taste amazing next to a grilled or pan-cooked steak, with their texture and flavor balancing the rich meat perfectly. For a veggie meal with lots of different textures, pair them with creamy risotto or polenta, letting the crispy carrots add crunch against the soft grains. Fish lovers will notice how well these carrots work with simply cooked salmon or white fish, where the carrot's sweet earthiness complements delicate seafood without taking over. In colder weather, serve them alongside hearty stews where the carrots' crispiness contrasts nicely with tender, slow-cooked meats. This flexible side works for everything from quick weeknight meals to fancy holiday dinners, fitting in with all kinds of cooking styles and flavor profiles.
Tasty Twists
Try out fun changes to this simple recipe by adding thoughtful extras that work well with the carrots' natural sweetness. For a fall-inspired version, mix in ½ teaspoon ground cinnamon and a tiny bit of nutmeg with your seasonings, creating a sweet-spicy flavor that's perfect for holiday meals. Spice fans might like adding ¼ teaspoon of cayenne or smoked paprika to the mix for a mild heat that balances the carrots' sweetness. For an herby option, scatter fresh chopped rosemary or thyme over the carrots during the last five minutes of cooking, which adds aromatic flavors without burning the delicate herbs. If you want more crunch, sprinkle 2 tablespoons of panko breadcrumbs mixed with a teaspoon of olive oil over the carrots before the final cooking step, creating an extra crispy layer. For a totally different taste, swap the Parmesan for crumbled feta and add lemon zest to your seasonings, then finish with chopped fresh dill after cooking for a Mediterranean flavor that's great with grilled meats and fish.
Fixing Problems
Get perfect results every time by knowing how to fix common issues when making crispy flattened carrots. If your carrots are getting too brown on the outside but aren't soft inside yet, drop the oven temp to 375°F and loosely cover with foil for part of the cooking time, taking the foil off for the last 10 minutes to bring back the crispiness. On the flip side, if your carrots are cooked through but not getting crispy enough, move the baking sheet higher in the oven and turn up the heat to 425°F for the last few minutes of cooking, keeping an eye on them so they don't burn. If your carrots fall apart when you flatten them, they probably cooked too long during boiling; next time, cut the boiling time by 2-3 minutes and check often with a fork for that perfect slightly firm texture. If the Parmesan coating isn't browning well, try using cheese grated on the larger holes, which makes bigger pieces that brown better than finely grated cheese. If your carrots stick to the parchment when you try to flip them, let them cook a minute or two longer before trying again—properly browned surfaces come off more easily than ones that haven't developed a crust yet.
Prep Ahead Ideas
Save time on meal prep with smart do-ahead steps that keep these crispy carrots tasting great. For partial prep, boil the carrots until just tender, then plunge in ice water to stop cooking, drain well, and keep in the fridge in a sealed container up to 2 days. When you're ready to finish, let the carrots come to room temp, then go ahead with the seasoning, flattening and roasting steps. You can also mix the olive oil-Parmesan blend up to 24 hours ahead and keep it covered in the fridge; just let it warm up and stir well before coating the carrots. For parties, you can do the whole process up to the flipping stage, then refrigerate the half-cooked carrots on their baking sheet wrapped in plastic for up to 8 hours. Finish by roasting at 400°F for 15-20 minutes right before serving. While these carrots taste best straight from the oven, leftover fully cooked ones can be kept in the fridge up to 3 days and reheated in a 375°F oven for 7-10 minutes to bring back some crunch—though they won't be quite as crispy as when first made. For a totally different way to use leftovers, roughly chop cold carrots and toss into salads or grain bowls for a tasty, crunchy addition that doesn't need reheating.
 Pin it
These crispy flattened carrots have changed how I think about veggie sides. What started as a random try-out has become my go-to dish - the one guests ask for most and the first to vanish from the table. There's something really satisfying about turning an everyday veggie into something special through a simple technique rather than fancy ingredients. The mix of caramelized, crunchy edges with tender centers creates a texture experience that makes the whole meal better. Whether they're next to a holiday roast or just a quick weeknight dinner, these carrots show that veggies can be the star of the meal instead of just an afterthought.
Frequently Asked Questions
- → Can I prepare the carrots early?
- Sure! Boil the carrots ahead and store them in the fridge for up to 48 hours. When you're ready to use them, let them reach room temperature, then season, flatten, and bake them. Make sure to roast them fresh for the crispiest texture.
- → Why aren't my carrots crisping?
- It could be your oven temperature—check it's properly pre-heated to 425°F. Also, make sure you've drained the carrots thoroughly before smashing. Lastly, avoid overcrowding the baking tray; they need space to roast evenly.
- → Can I experiment with different flavors?
- Of course! Add your favorite spices or herbs—try cumin and paprika for a smoky vibe, or cinnamon and maple syrup for something sweet. Just tweak the seasoning while following the same smashing and roasting method.
- → Do carrots need to be peeled?
- Not necessarily! If the carrot skin isn't thick or bitter, you can scrub them clean instead of peeling. Organic carrots, especially, often have sweeter, thinner skins that work well unpeeled for extra nutrients.
- → What pairs well with crispy carrots?
- They go great with roasted meats like chicken or beef, or something lighter like grilled fish. You can also serve them with grain dishes, or enjoy them vegetarian-style with lentils or tofu!