
 Pin it
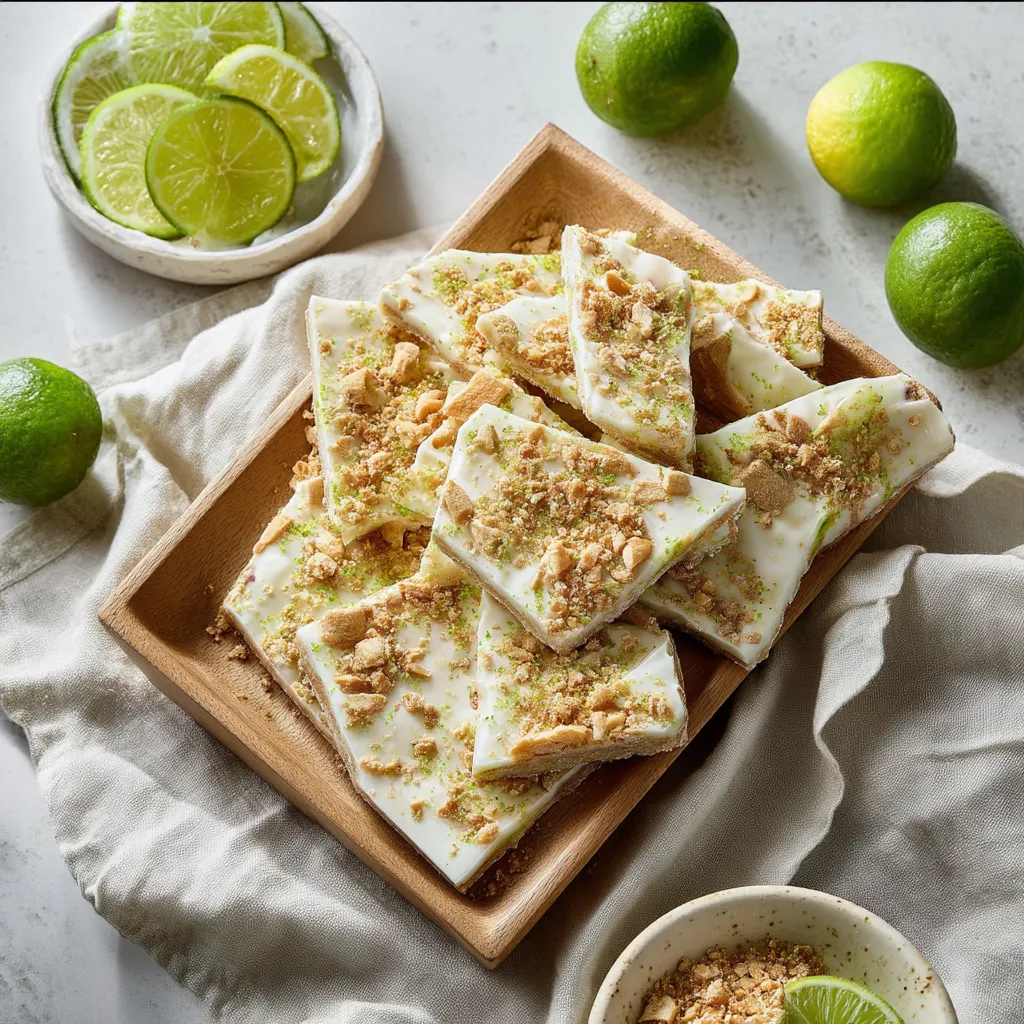
This frozen key lime pie yogurt bark turns basic ingredients into a cool, refreshing treat that hits the spot when you want something sweet. It packs a nutritional punch too. Instead of using heavy cream and loads of sugar like regular frozen desserts, this lighter option uses protein-packed Greek yogurt as its base, with bright, zingy key lime flavor that really captures what makes the classic pie so good. When you bite into it, you get that amazing contrast between the tangy-sweet frozen yogurt and the crunchy graham cracker and coconut on top - it's just like the crust and filling combo you love in key lime pie. It's perfect when it's hot outside or after you've worked out, giving you all the yummy satisfaction of dessert plus the bonus of muscle-building protein and gut-friendly probiotics. You can enjoy this anytime without a second thought.
I came up with this yogurt bark while hunting for a protein-rich snack that would make my sweet tooth happy without messing up my fitness routine. When my family tried it, they went wild - even my kids, who usually look at "healthy snacks" like they're from another planet, ate the whole batch in one day and begged for more. The biggest shock for me was how freezing transformed that simple yogurt mix into something that truly tasted like key lime pie, with that perfect sweet-tangy balance. These days it's our favorite summer snack that I can hand out on even the hottest days without feeling bad about it (and I can enjoy plenty myself too).
Basic Ingredients
- 2 cups plain Greek yogurt: Forms the thick, protein-loaded foundation
- 2 tablespoons key lime juice: Gives that real citrus kick
- 1 tablespoon powdered Swerve: Adds sweetness with no sugar crash
- 1 teaspoon vanilla extract: Brings richness and extra flavor notes
- 1 scoop vanilla protein powder: Ramps up the protein content
Your choice of Greek yogurt really affects how the final treat turns out. For the smoothest results, go with full-fat, though lower-fat works fine if you're counting calories. Pick a smooth, nice-tasting vanilla protein powder that mixes in without getting chalky - whey isolate does the job perfectly, but you can swap in plant-based options if you don't do dairy. For the key lime juice, freshly squeezed gives the brightest flavor, but the bottled stuff (make sure it's key lime, not regular lime) works great too and saves time. You can play with the sweetener based on what you like - powdered Swerve keeps the sugar count low, but honey or maple syrup make tasty versions with different flavor notes.
Quick Preparation
- Making The Yogurt Mix:
- Let all your ingredients warm up a bit for easier mixing, especially the Greek yogurt - just 10-15 minutes out of the fridge helps. Grab a medium bowl and measure out 2 cups of plain Greek yogurt. Make sure it's nice and thick - pour off any liquid on top before measuring. Add 1 scoop (about ¼ cup) of vanilla protein powder to your yogurt. If you see lumps in the powder, sift it first so your mixture stays smooth. Pour in 2 tablespoons of key lime juice, 1 tablespoon of powdered Swerve (or whatever sweetener you picked), 1 teaspoon of vanilla extract, and 1 teaspoon of fresh lime zest, saving a little zest for topping. Mix everything with a whisk or rubber spatula until it's completely smooth with no streaks of protein powder. Don't mix too hard or too long or you'll break down the yogurt. The mixture should be thick enough to hold its shape on your spoon but still easy to spread around.
- Getting It On The Pan:
- Cover a regular rimmed baking sheet (about 13x18 inches) with parchment paper or a silicone mat. Make sure it hangs over the edges a bit so you can lift it out easily later. Pour your yogurt mix right in the middle of your lined baking sheet. Using a spatula or the back of a big spoon, start spreading from the center outward with smooth, even strokes. Try to make it about ¼ inch thick everywhere - thin enough to freeze quickly and break easily later, but thick enough to hold your toppings without falling apart. Work carefully to get an even layer all the way to the edges, since uneven spots will freeze at different rates. You want the spread to cover about a 9x13 inch area for easy portioning. If it gets sticky while spreading, dip your spatula in warm water, wipe it dry, and keep going for a smoother finish.
- Adding The Toppings:
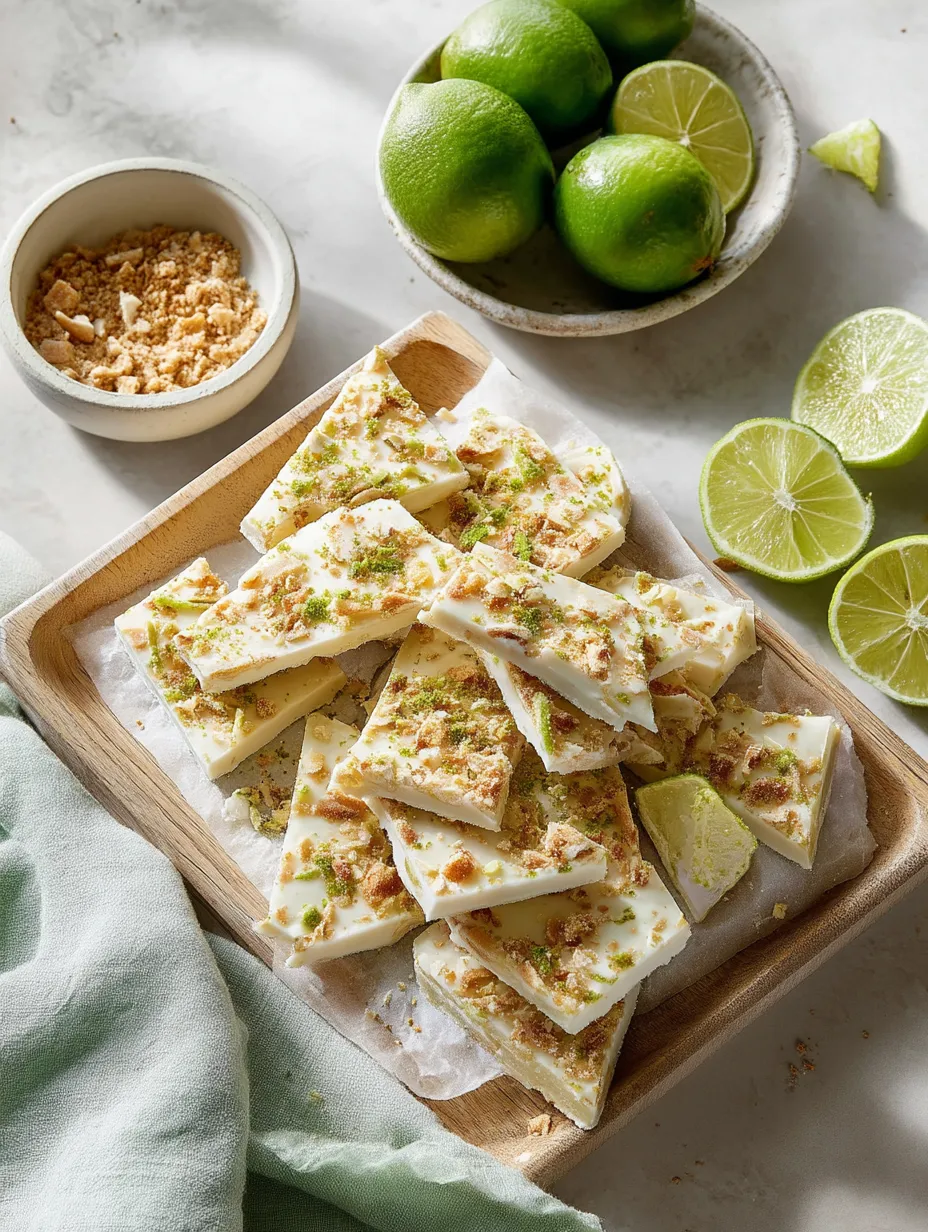
- After spreading your yogurt mixture evenly, it's time to add toppings that'll give you that key lime pie texture contrast. Scatter about ¼ cup of crushed graham crackers over the yogurt surface. If you need gluten-free options, Simple Mills Honey Cinnamon Sweet Thins work great, or you can use any graham-style cookie or even granola instead. Next, sprinkle 2 tablespoons of toasted coconut flakes across the top. Toasting brings out a nutty flavor and helps the coconut stay crunchy even when frozen - if yours isn't pre-toasted, you can quickly toast it in a dry pan over medium heat until golden, watching it closely so it doesn't burn. Finally, sprinkle your saved lime zest over everything for color and extra citrus punch. Try to spread all toppings evenly while still letting some yogurt show through for a pretty pattern. Gently press the toppings into the yogurt with the back of a spoon or your fingertips so they stick during freezing.
- Freezing It Solid:
- Carefully put your baking sheet in the freezer, keeping it flat so the yogurt doesn't slide to one side. Place it on a level surface where it won't get bumped for at least 2-3 hours. It needs this time to freeze completely solid for the right texture and easy breaking later. Try to put it away from the freezer door and not directly under the cooling fan, where temperature changes happen more often. Freezing time changes depending on how cold your freezer is and how thick you spread the yogurt. You'll know it's ready when it feels completely firm to the touch and looks more matte than shiny. For the best texture, letting it freeze overnight is even better if you have time, making sure it's frozen all the way through with perfect consistency.
- Breaking It Up and Keeping It Fresh:
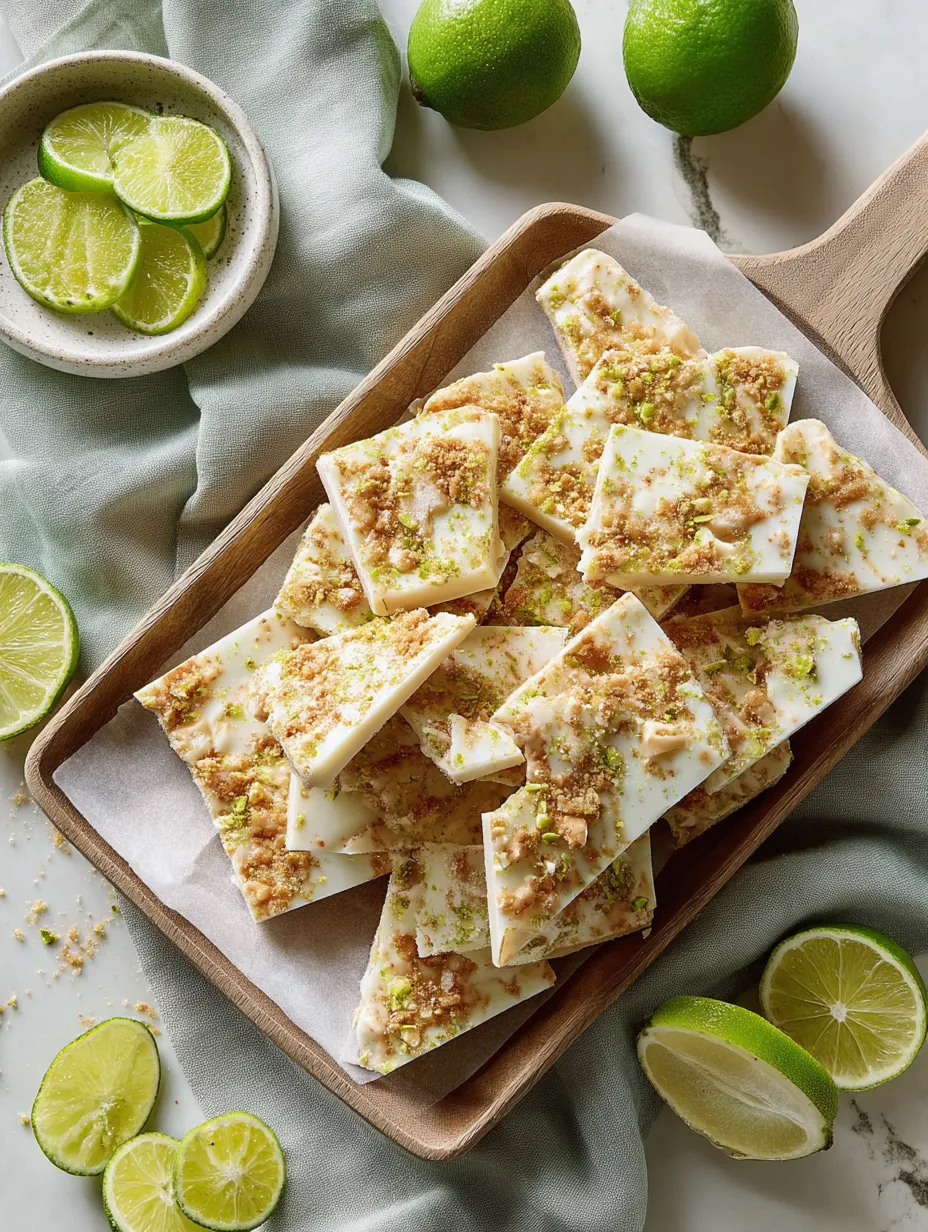
- Once your yogurt bark is completely frozen, pull the baking sheet from the freezer. Grab the parchment paper edges to lift the whole frozen slab off the pan and put it on a clean cutting board. Using clean hands or a sharp knife, break or cut it into about 12-16 pieces however big you want - the random shapes actually look nice and rustic. For cleaner cuts, run a knife under hot water, dry it off, then cut. If you want to eat some right away, serve the pieces immediately while they're still frozen solid and refreshingly cold. They'll start to soften after about 5-10 minutes at room temperature, so plan to eat them quickly. To store leftover pieces, put them in an airtight container with parchment paper between layers so they don't freeze together. Stored properly, your yogurt bark will stay good for up to two weeks in the freezer. Just grab individual pieces whenever you want them - no need to thaw this frozen treat that's meant to be enjoyed ice cold.
 Pin it
I've tried so many frozen yogurt recipes through the years, but this key lime version always comes out on top with its perfect mix of tang and sweetness. What really amazes me is how just adding some graham cracker bits and toasted coconut completely changes the experience, truly giving you that key lime pie feeling in a healthier way. My gym buddies didn't believe me when I told them about this high-protein treat, but their doubts disappeared with the first bite. Now it's our go-to reward after workouts that satisfies sweet cravings without messing up our nutrition plans. I've also found this basic recipe works great as a starting point - I've made everything from summer berry versions to fall pumpkin variations.
Tasty Variations
Switch up this yogurt bark to create new flavor experiences while keeping all that protein goodness. For a taste of the tropics, swap out the key lime juice for 2 tablespoons of pineapple juice and press ¼ cup of small diced mango pieces into the top before freezing, giving you a piña colada feel that's perfect for summer. If you love chocolate, try mixing 1 tablespoon of unsweetened cocoa powder into your yogurt base and sprinkling 2 tablespoons of mini dark chocolate chips on top for a cookies-and-cream vibe that tackles serious dessert cravings. When summer fruits look amazing, fold ½ cup of mashed raspberries or strawberries into your yogurt mix for gorgeous color and bright flavor, then top with crushed freeze-dried berries instead of graham crackers. Coffee fans can add 1 teaspoon of espresso powder to the yogurt and sprinkle cacao nibs on top for a grown-up mocha bark that perks up your afternoon. In fall and winter, try swapping the key lime juice for 2 teaspoons of pumpkin pie spice and 2 tablespoons of pumpkin puree, then top with crushed gingersnaps instead of graham crackers for a treat that tastes like autumn.
Nutrition Upgrades
Pump up the already solid nutritional value of this yogurt bark with smart additions that do more than just add protein. For heart and brain-friendly omega-3s, scatter 2 tablespoons of chia seeds or ground flaxseeds across the top before freezing - they'll add a nice texture contrast too. If you want more antioxidants, mix ¼ teaspoon of matcha green tea powder into your yogurt base and top with goji berries or golden berries for a superfood version with bright colors and extra health benefits. To help your digestion, try adding 1 tablespoon of prebiotic fiber powder to your yogurt mixture - it works together with the probiotics already in yogurt to support your gut health. If you want more vitamins and minerals, stir in 1 tablespoon of spirulina or a greens powder (though this will change the color quite a bit) and top with pumpkin seeds for a true nutrient powerhouse. For staying full longer and getting heart-healthy fats, drizzle 1 tablespoon of almond butter in a swirl pattern on top before adding the graham cracker bits - it creates beautiful marbling while adding monounsaturated fats that help keep hunger away longer.
Ways To Serve It
Make your yogurt bark feel extra special with fun serving ideas. For weekend brunches, create a yogurt bark platter by arranging broken pieces alongside fresh berries, extra toasted coconut, a little honey for drizzling, and some lime wedges - guests can customize their own plates and it looks really impressive. Make snack time more exciting by using yogurt bark pieces as "chips" for scooping up a small amount of fruit salsa made from chopped mango, strawberries, and mint - kids especially go crazy for this playful twist. For a fancier dessert option, stack 2-3 small bark pieces with layers of fresh raspberries between them and a tiny puff of whipped coconut cream on top, creating a fancy-looking treat worthy of dinner parties. On hot pool days, serve yogurt bark alongside cucumber water and watermelon slices for a cooling and hydrating spread that's perfect in the heat. After a workout, pair a piece of bark with a small handful of pistachios or almonds for a balanced mix of carbs and extra protein that helps muscles recover while still tasting like a treat rather than boring "fitness food."
Keeping It Fresh
Keep your yogurt bark in top shape with storage tricks that work for different situations. For everyday storage, put the broken pieces in a hard container rather than a plastic bag to prevent them from breaking, with parchment paper between layers and the container pushed toward the back of your freezer where the temperature stays most steady. If you're making bark for a party or event, try wrapping single pieces in parchment paper and tying with string or a cute sticker, then storing these bundles in a bigger container - this makes serving super easy with no last-minute fuss. For the longest shelf life (up to a month), wrap the whole unbroken slab tightly in plastic wrap, then foil, before putting it in a freezer bag with all the air pushed out - this gives multiple layers of protection against freezer burn and lets you break off pieces as needed. When taking yogurt bark on the go, like for picnics or kids' sports, put pieces in a small insulated lunch bag with an ice pack, where they'll stay frozen for about 2 hours depending on the outside temperature. If you're watching portions, break the bark into specific sizes and store in individual small containers, creating grab-and-go options that help control servings while still feeling like a special treat.
 Pin it
This key lime pie yogurt bark has totally changed how I think about healthy treats - proving that good-for-you options can actually satisfy dessert cravings for real. What started as just an experiment to get more protein has turned into a family favorite that everyone asks for, whether they care about nutrition or just want something tasty. The amazing mix of tart lime, sweet creaminess, and different textures really does feel like you're eating key lime pie, but the prep is so simple you can make it even on busy days. I now make double batches because it's so handy to grab a piece from the freezer for a quick breakfast, after working out, or as an evening treat. It's not just delicious but truly practical for eating better without feeling like you're missing out.
Frequently Asked Questions
- → Can I swap key limes for regular ones?
- Go ahead! Ordinary limes work just as well. Key limes bring a more intense aroma, but standard limes are easier to grab and taste great too. Juice from 1-2 regular limes equals what you'd get from 3-4 key limes.
- → Can I skip the protein powder?
- Definitely! If you’re not a fan of protein powder, just leave it out. The yogurt bark still tastes amazing thanks to protein-rich Greek yogurt. You might want to add a little more sweetener since protein powders often already have some.
- → How can I make this dairy-free?
- Easy! Swap the Greek yogurt for a thick coconut yogurt or any plant-based alternative you like. Just make sure your protein powder is plant-based too. Texture might shift slightly, but the taste will still rock.
- → Why does my yogurt bark turn out icy?
- If you used low-fat yogurt, it might freeze icier. To get it creamier, try full-fat Greek yogurt. Adding a spoon of honey or maple syrup can also help stop big ice crystals from forming.
- → Can I make this ahead of time?
- Totally! This snack is great for prepping early. Freeze it up to two weeks ahead and keep it in an airtight container. Before a party, break it apart and freeze till the last second—it’ll soften quick once out.